This is a demo post to show you my progress in the AWS Cloud Resume Challange
AWS-CLOUD-RESUME-CHALLENGE
What is Cloud Resume Challenge? - The Cloud Resume Challenge is a multiple-step resume project which helps build and demonstrate skills fundamental to pursuing a career in Cloud. The project was published by Forrest Brazeal.
Services Used:
- S3
- AWS CloudFront
- Certificate Manager
- AWS Lambda
- Dynamo DB
- GitHub Actions
- Terraform
Live Demo using github 🔗
Live Demo using AWS 🔗
Setup Tutorial
- Static Website
- Custom Domain
- S3 Bucket
- Cloundfront
- SSL Certificate
- Route53 DNS Management
- Javascript - Visitor Counter
- DynamoDB
- AWS Lambda Function
- AWS Lambda Function connection
- Git and CI/CD
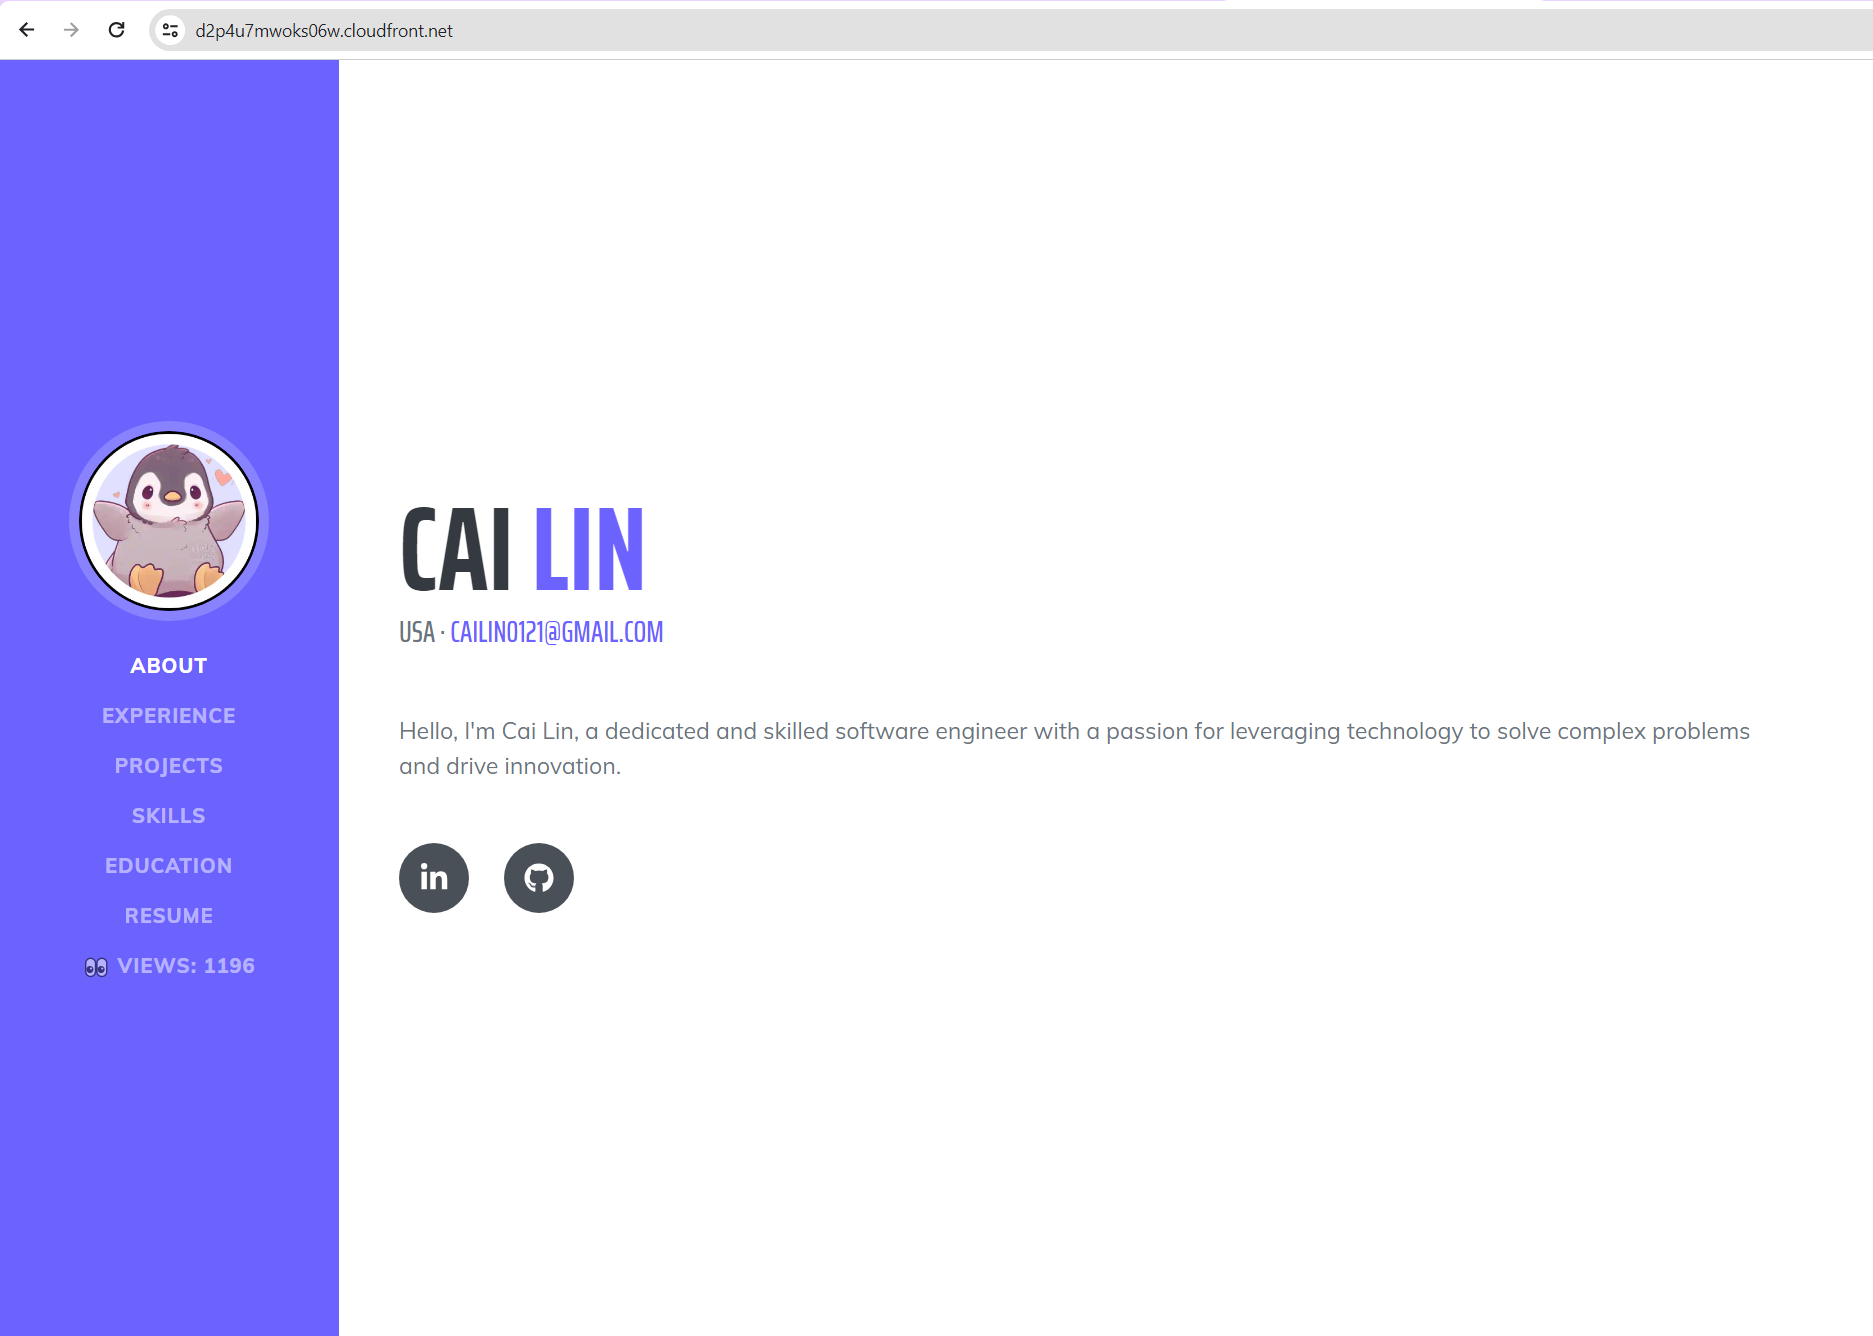
Static Website
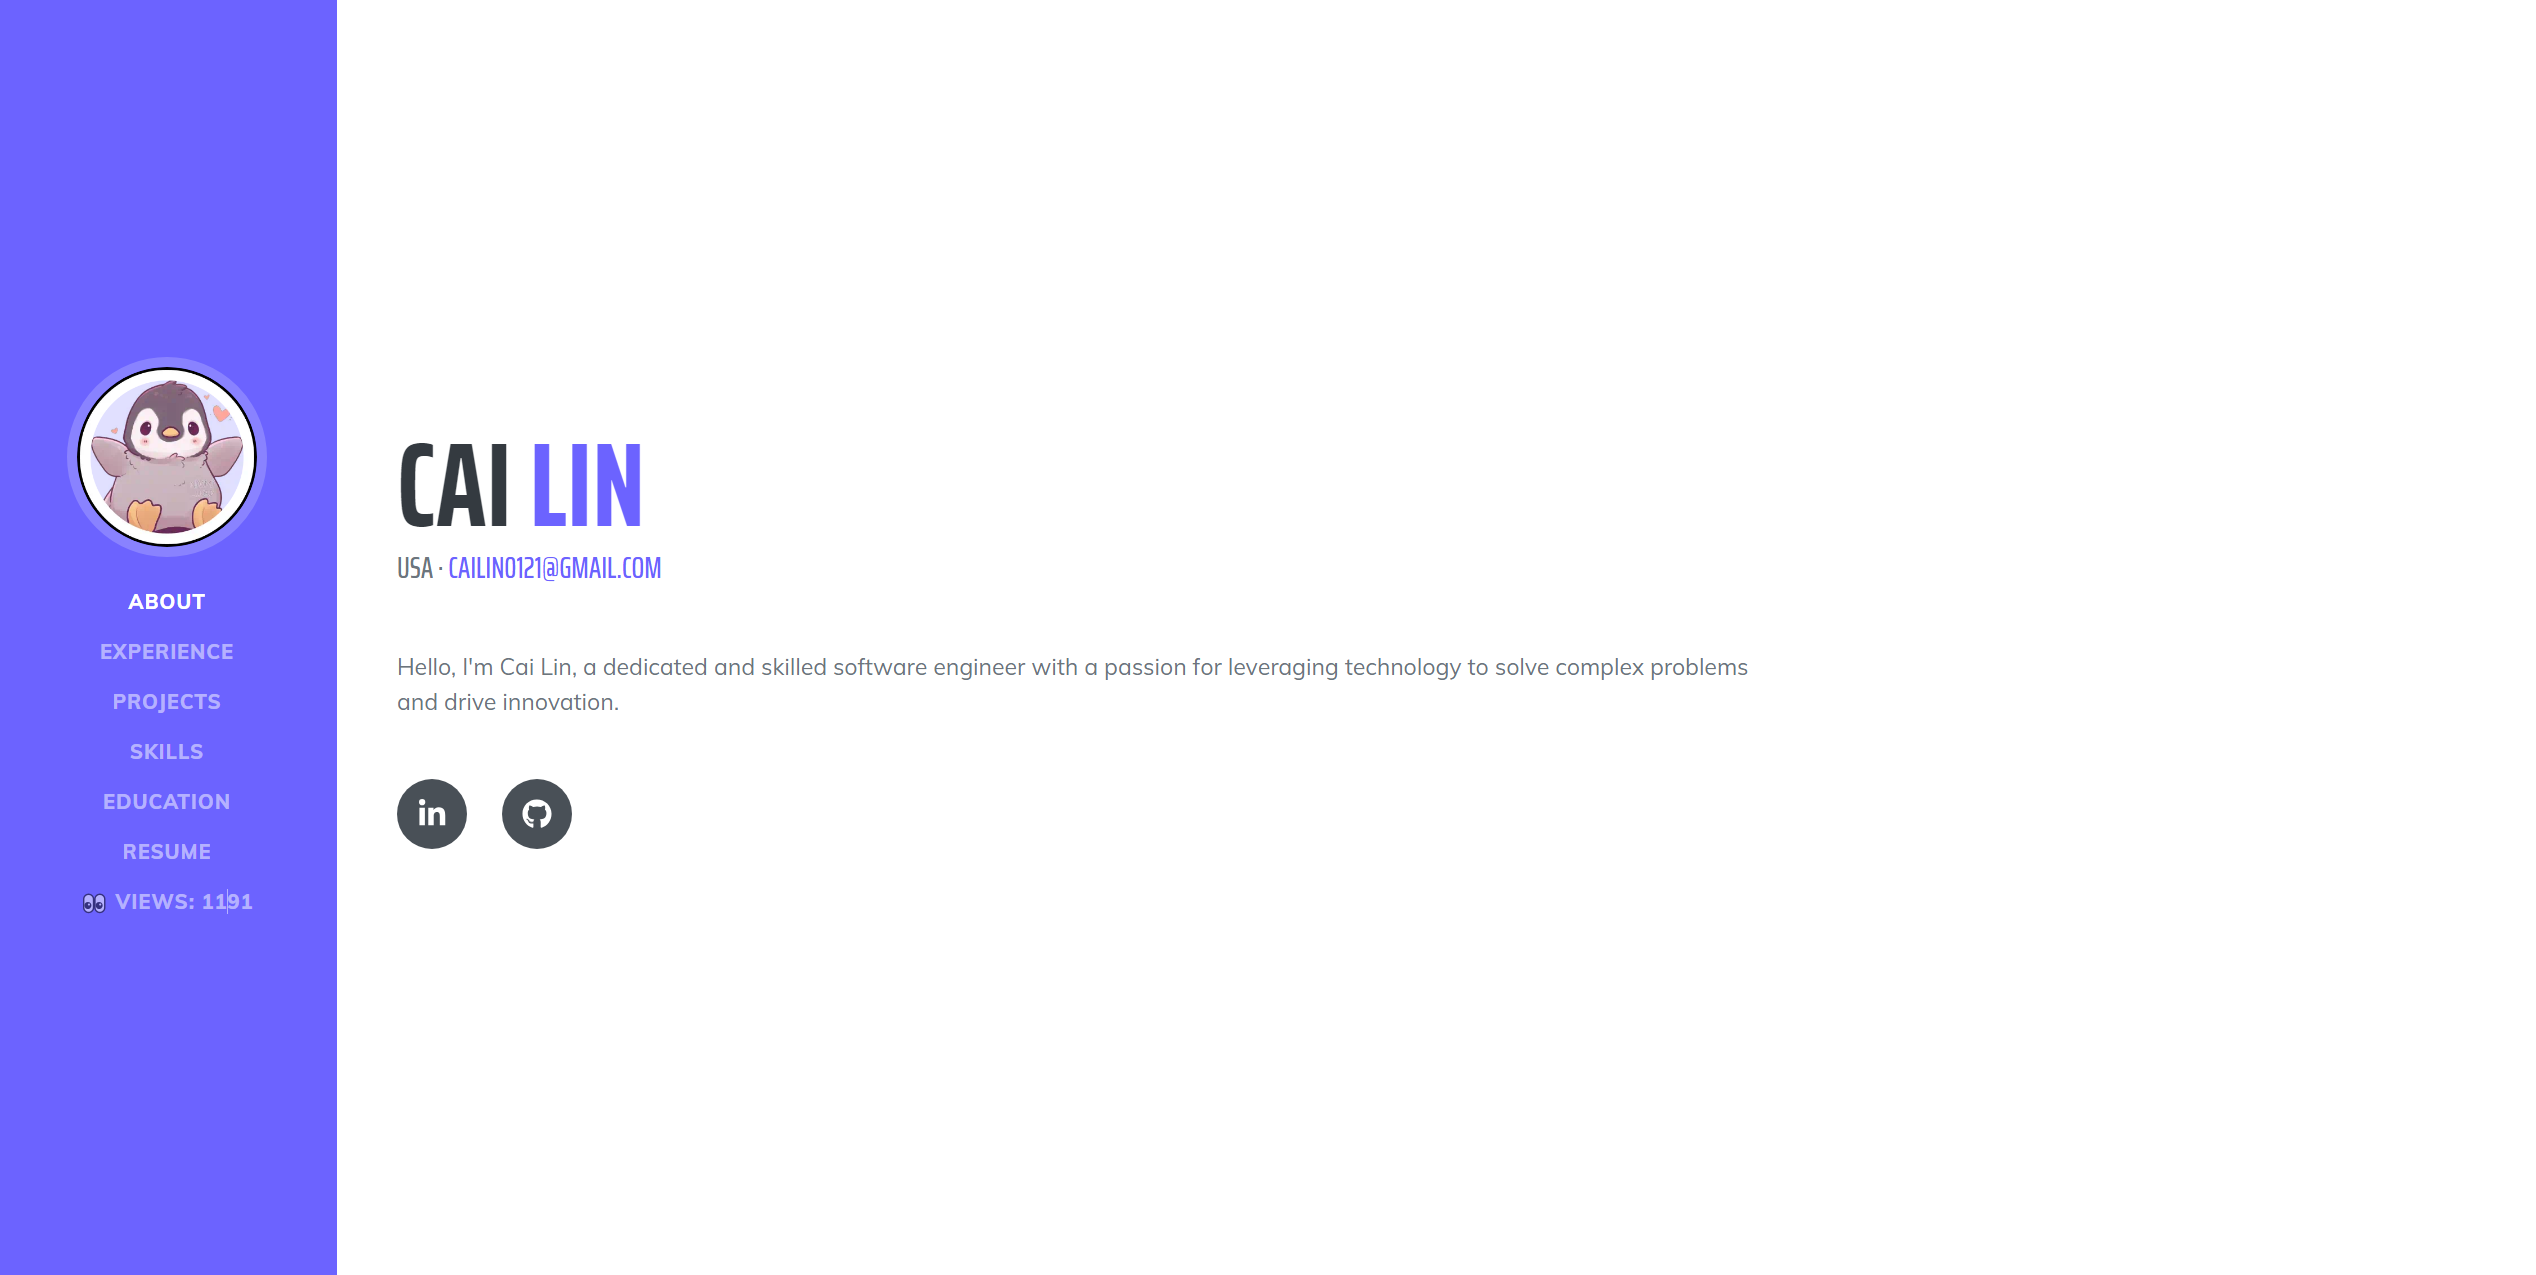
I created my static website based on a template
Custom Domain
- I used namecheap to purchase one domain and then I also used AWS Route 53 to purchase a domain
- https://www.namecheap.com/
- https://aws.amazon.com/route53/
- You can see below that I purchased the domain kaiion.com on namecheap and piguit.com on Route 53


S3 Bucket
- First you have to create an AWS account which is pretty straight forward
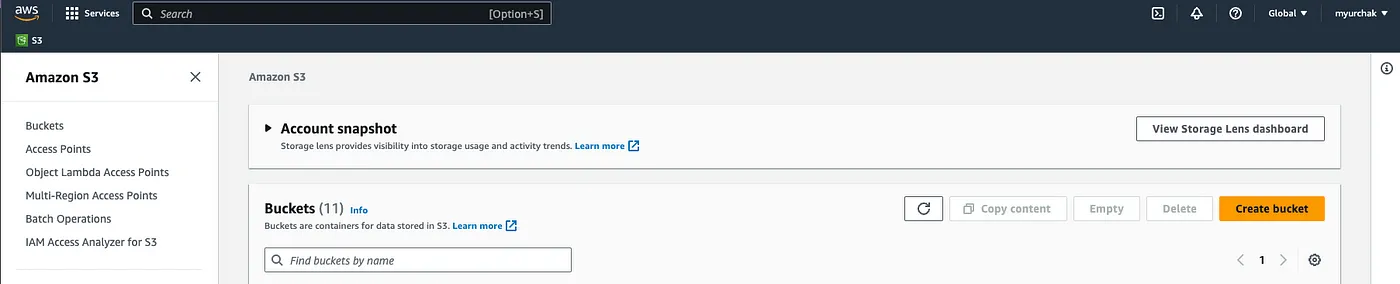
- Log onto your AWS console, search and click on “S3”
- Then click on the “Create bucket” button
- When choosing a name for the bucket, there are a list of naming conventions on S3
- Must be globally unique
- Must be DNS-compliant, meaning they can only contain lowercase letters, numbers, periods (.), and hyphens (-)
- Bucket names should not contain underscores (_), uppercase letters, spaces, or any special characters
- Bucket names should be between 3 and 63 characters long
- Reference to the S3 doc for naming convention
- You can choose your region, I selected “us-east-1” as the region for the bucket, and leave all other settings as default
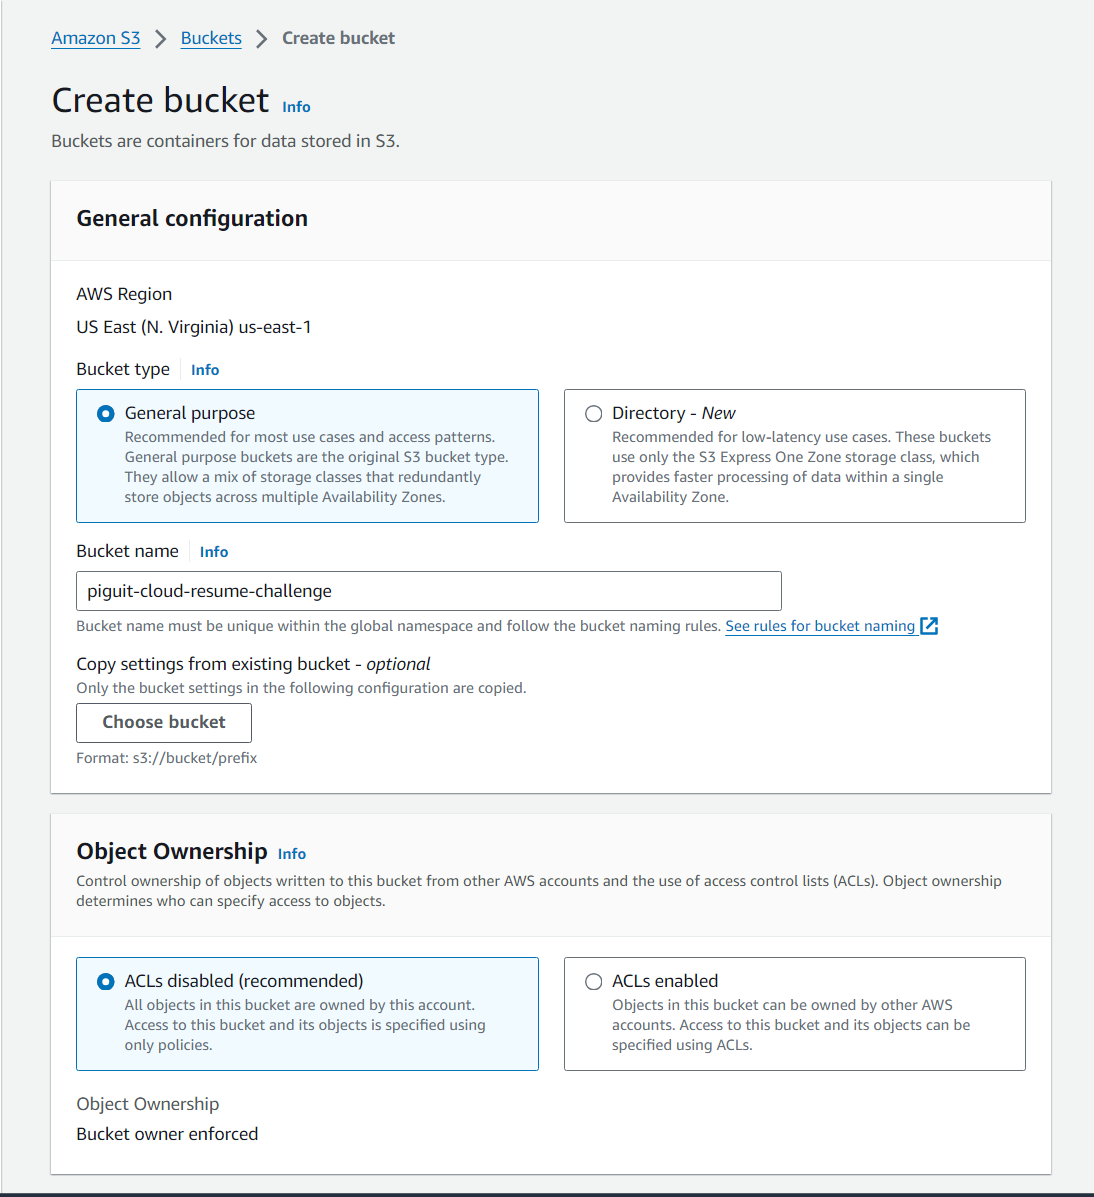
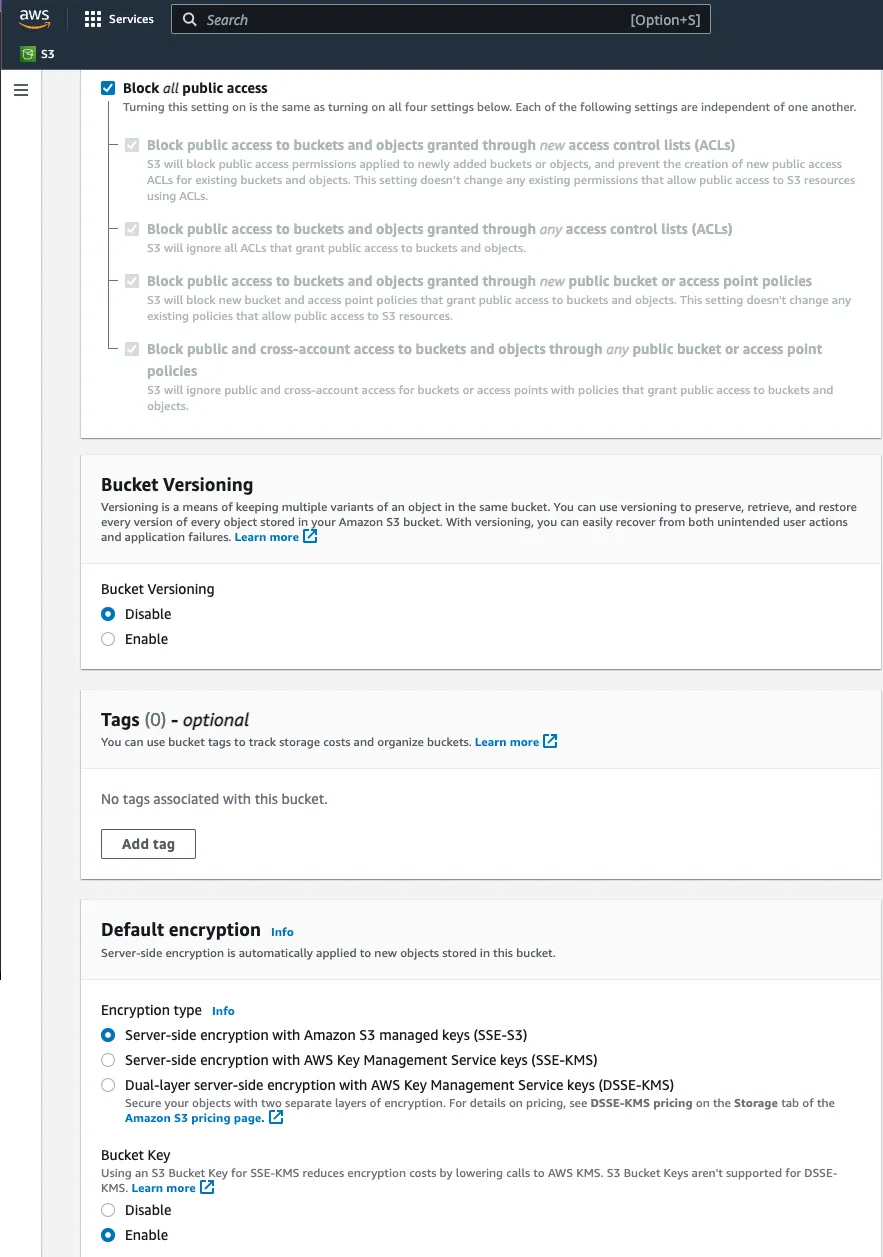
- Click on the “Create bucket” button at the bottom

- You will see your bucket created along with the corresponding message
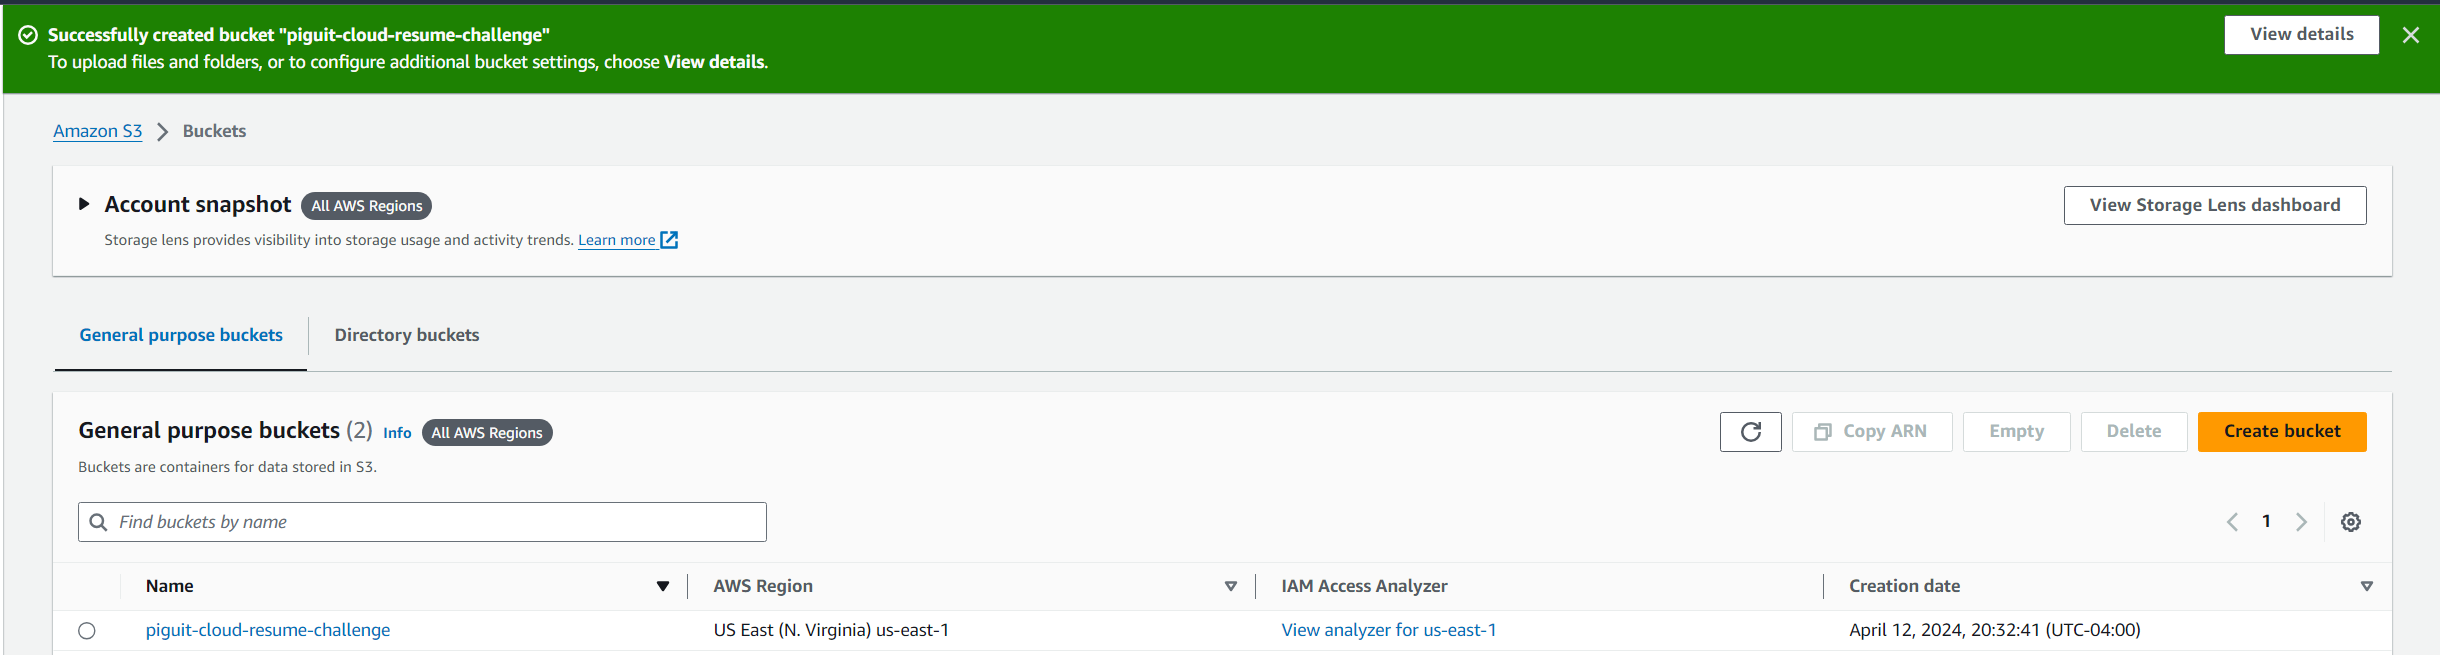
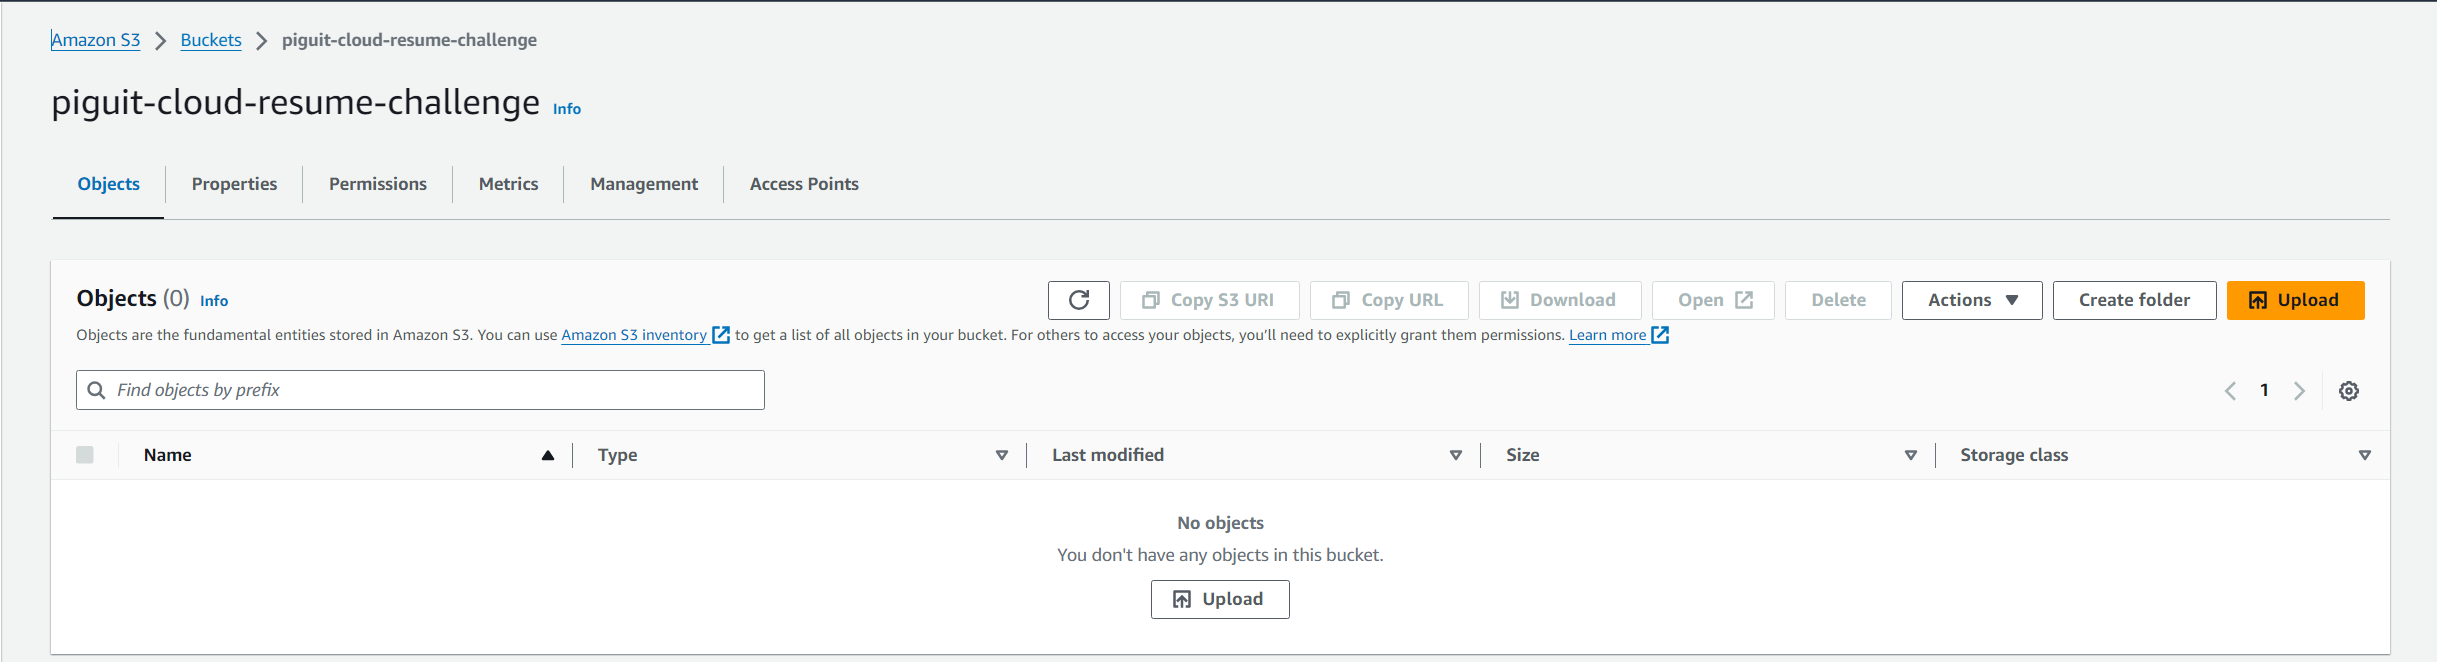
- Navigate into the created bucket and proceed to upload your static website files
- Click on “Upload” button
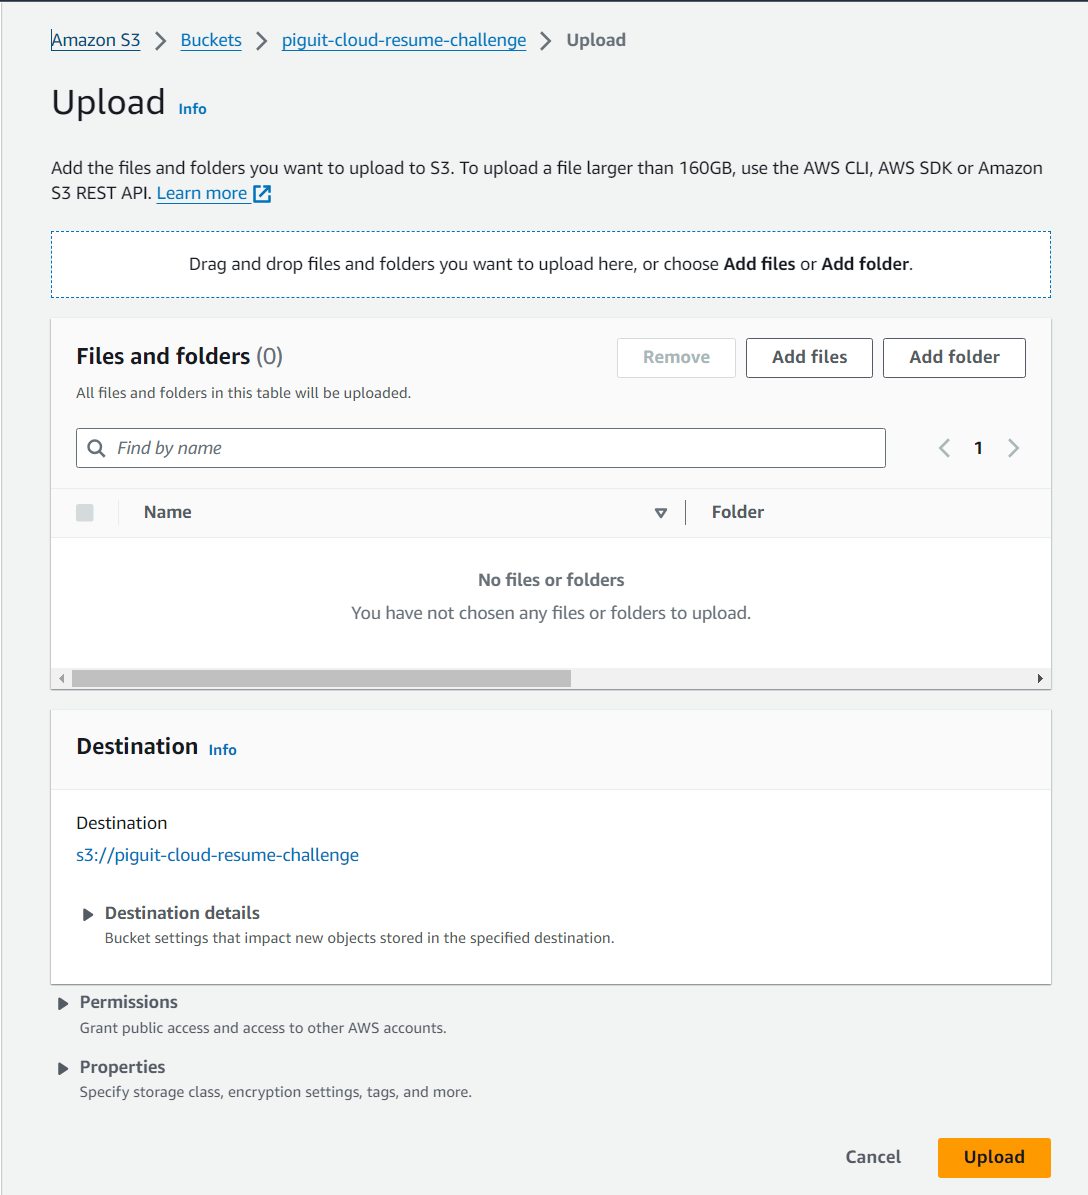
- Click on “Add files” to upload them into the bucket
- Once the files appear in the bucket, click on the “Upload” button to proceed with the upload process
- Our website is almost ready to be hosted
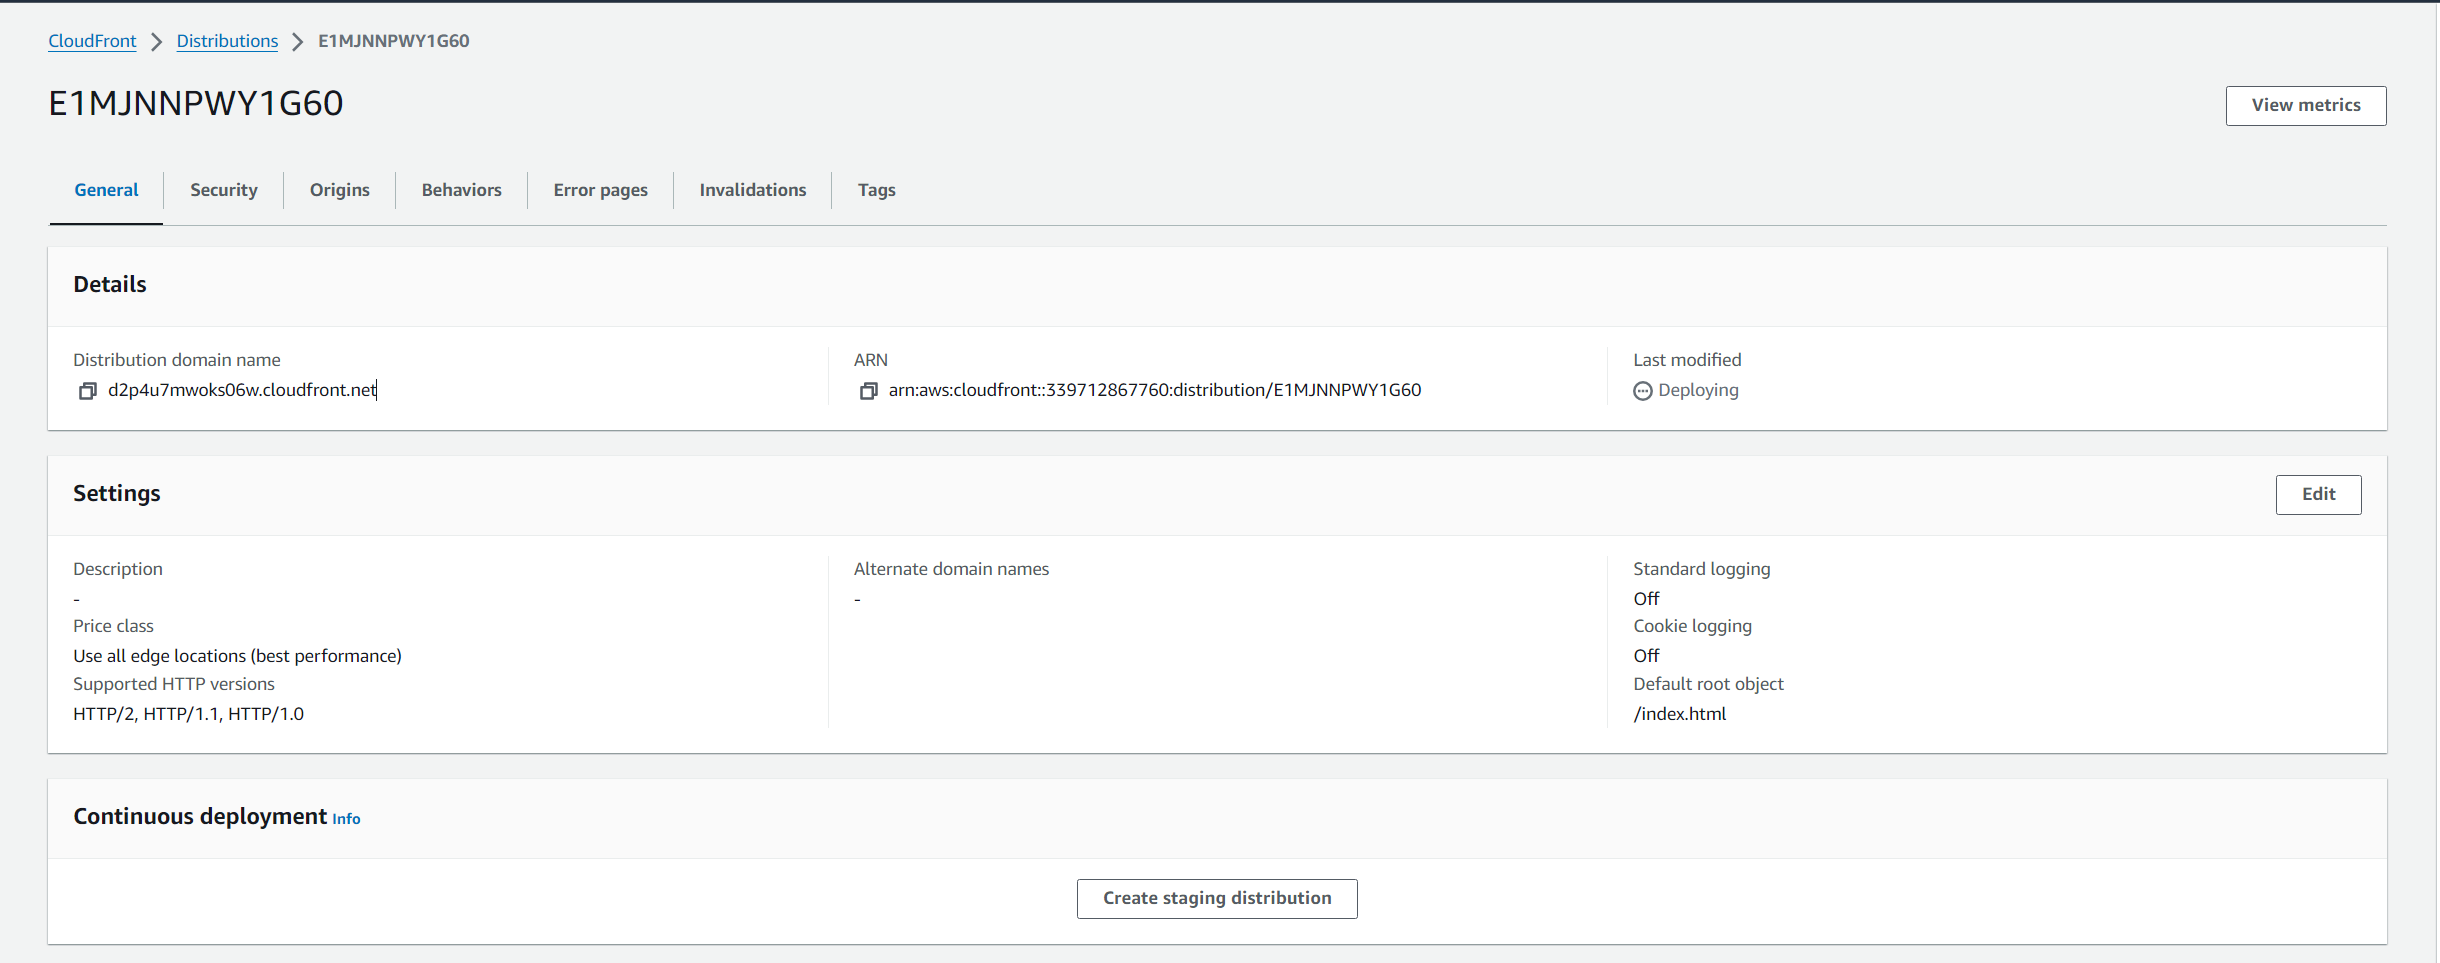
Cloudfront
- Go to CloudFront resource by navigating through the search bar.

- Click on “Create distribution” button.

- Select your s3 bucket domain in “Origin Domain” section.
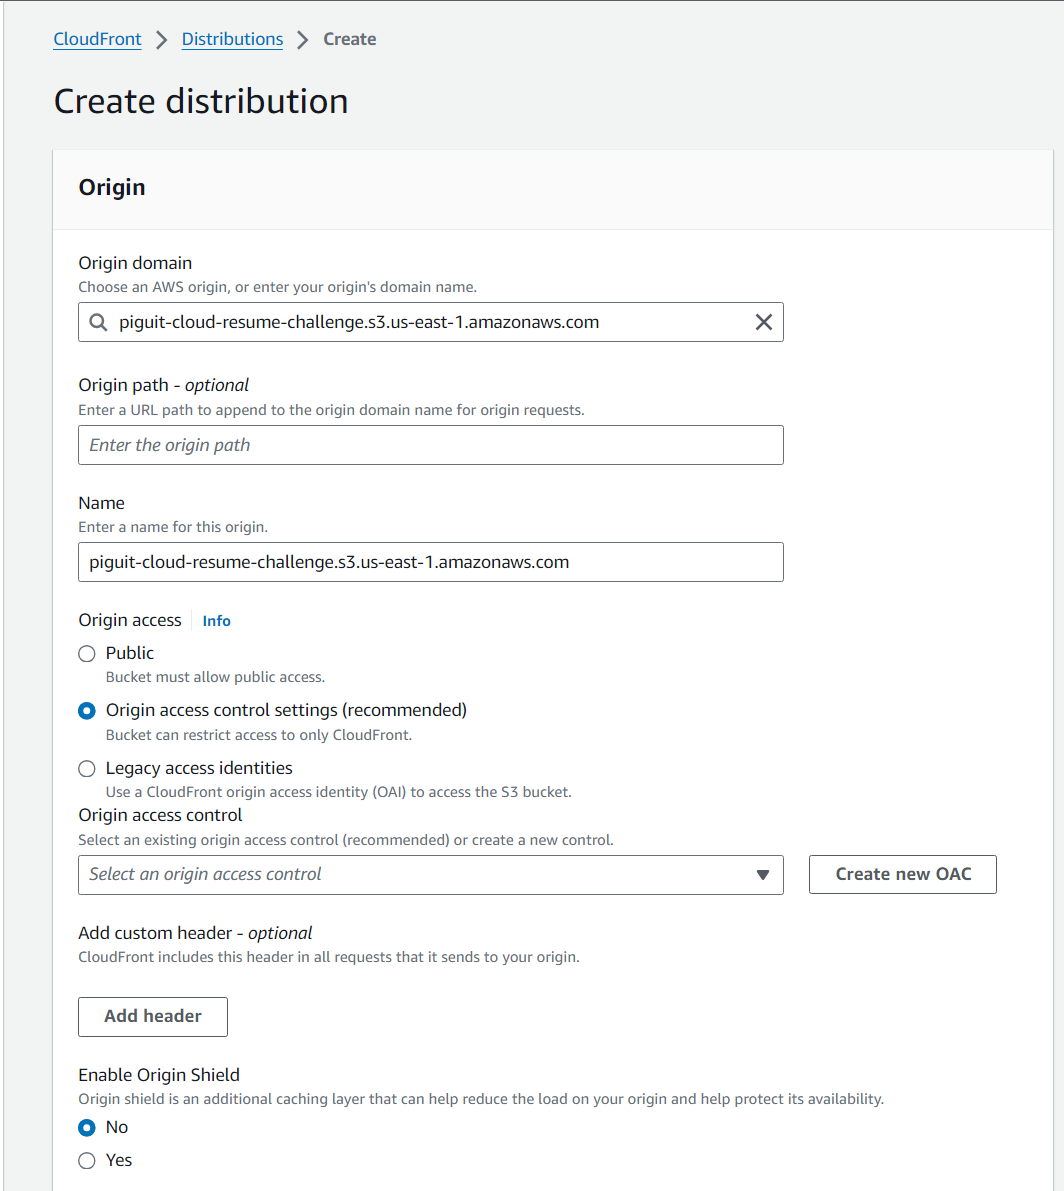
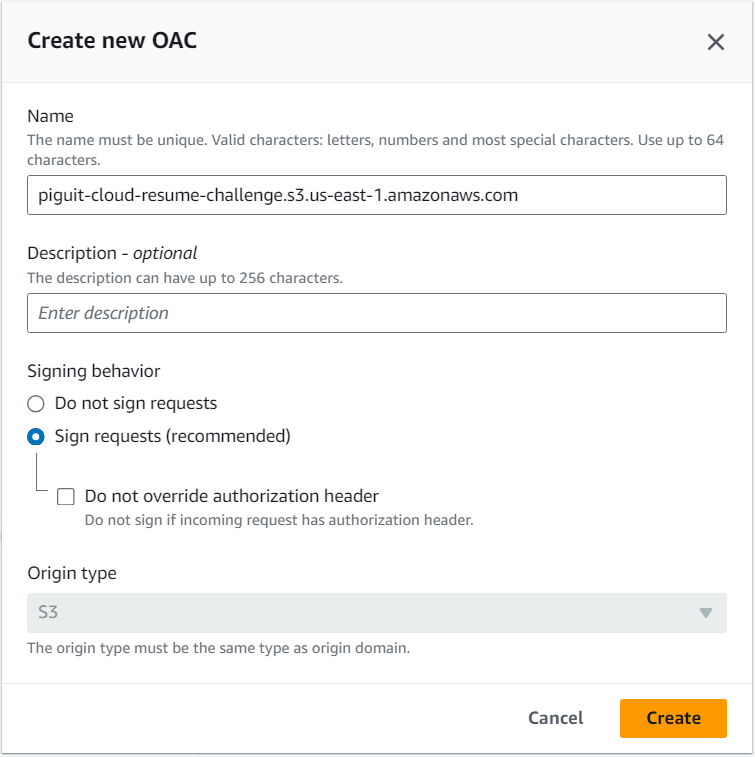
- “Create new OAC” after selected “Origin access control settings (recommended)” in “Origin access” section.
- Origin type could be “S3”.
- In Viewer protocol policy select “HTTPS only”.
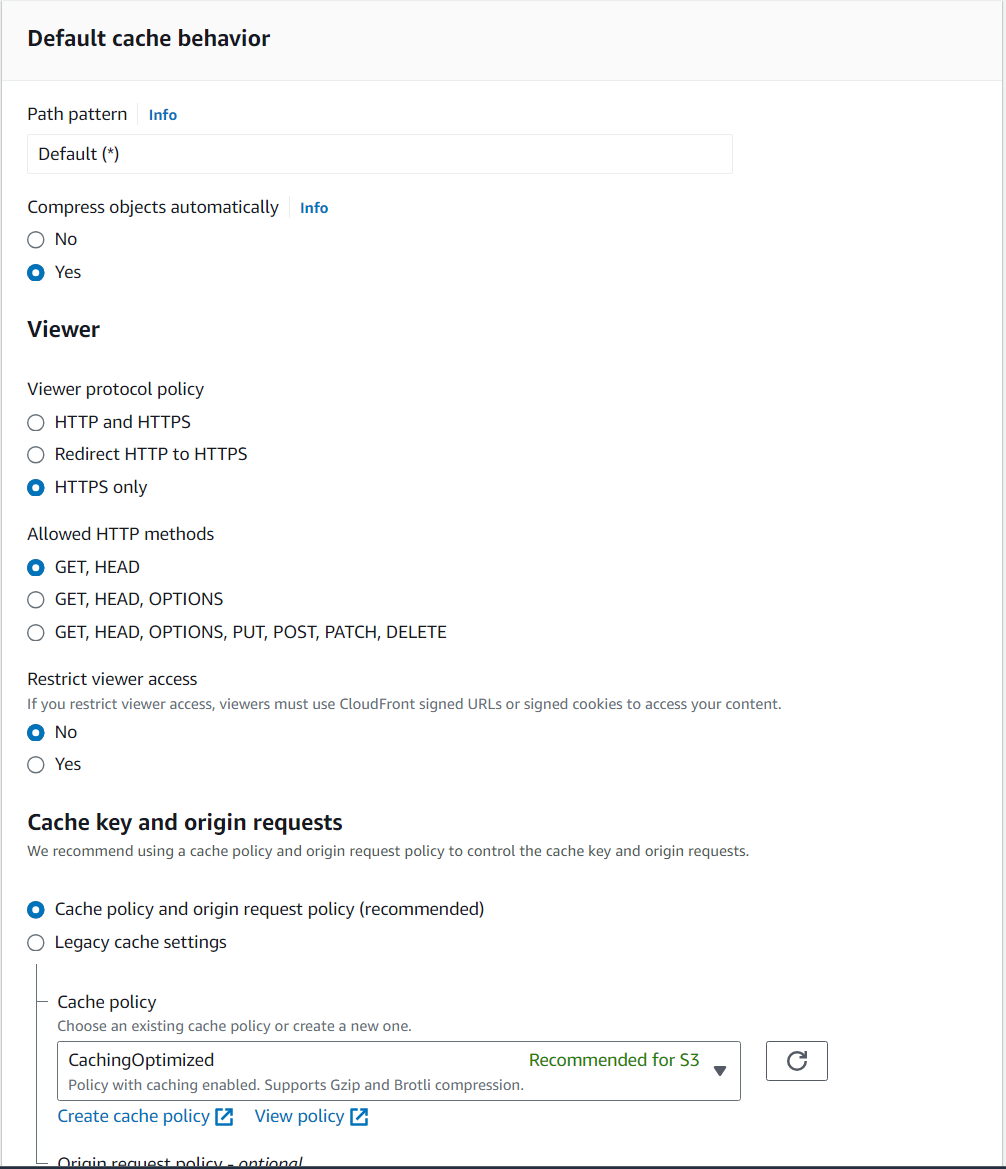
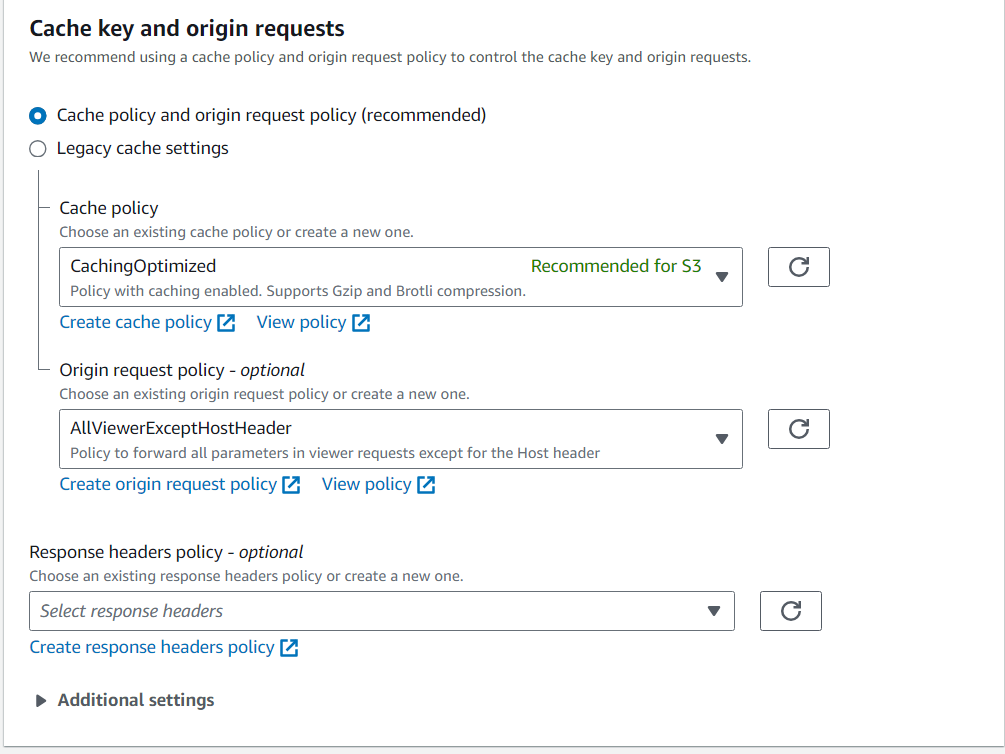
- Scroll down to “Cache key and origin requests” and set next values.
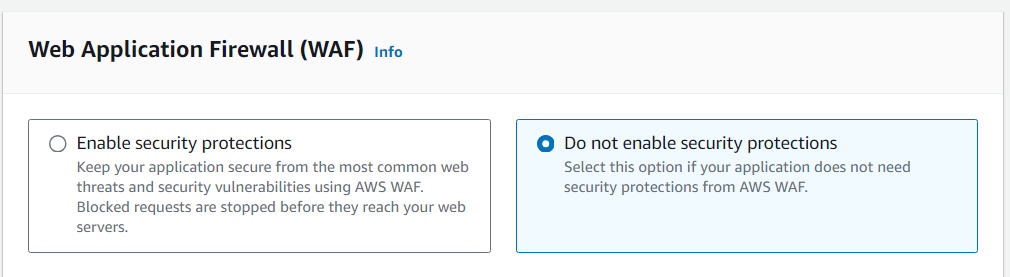
- In my case I turn off WAF (Web Application Firewall) to save money
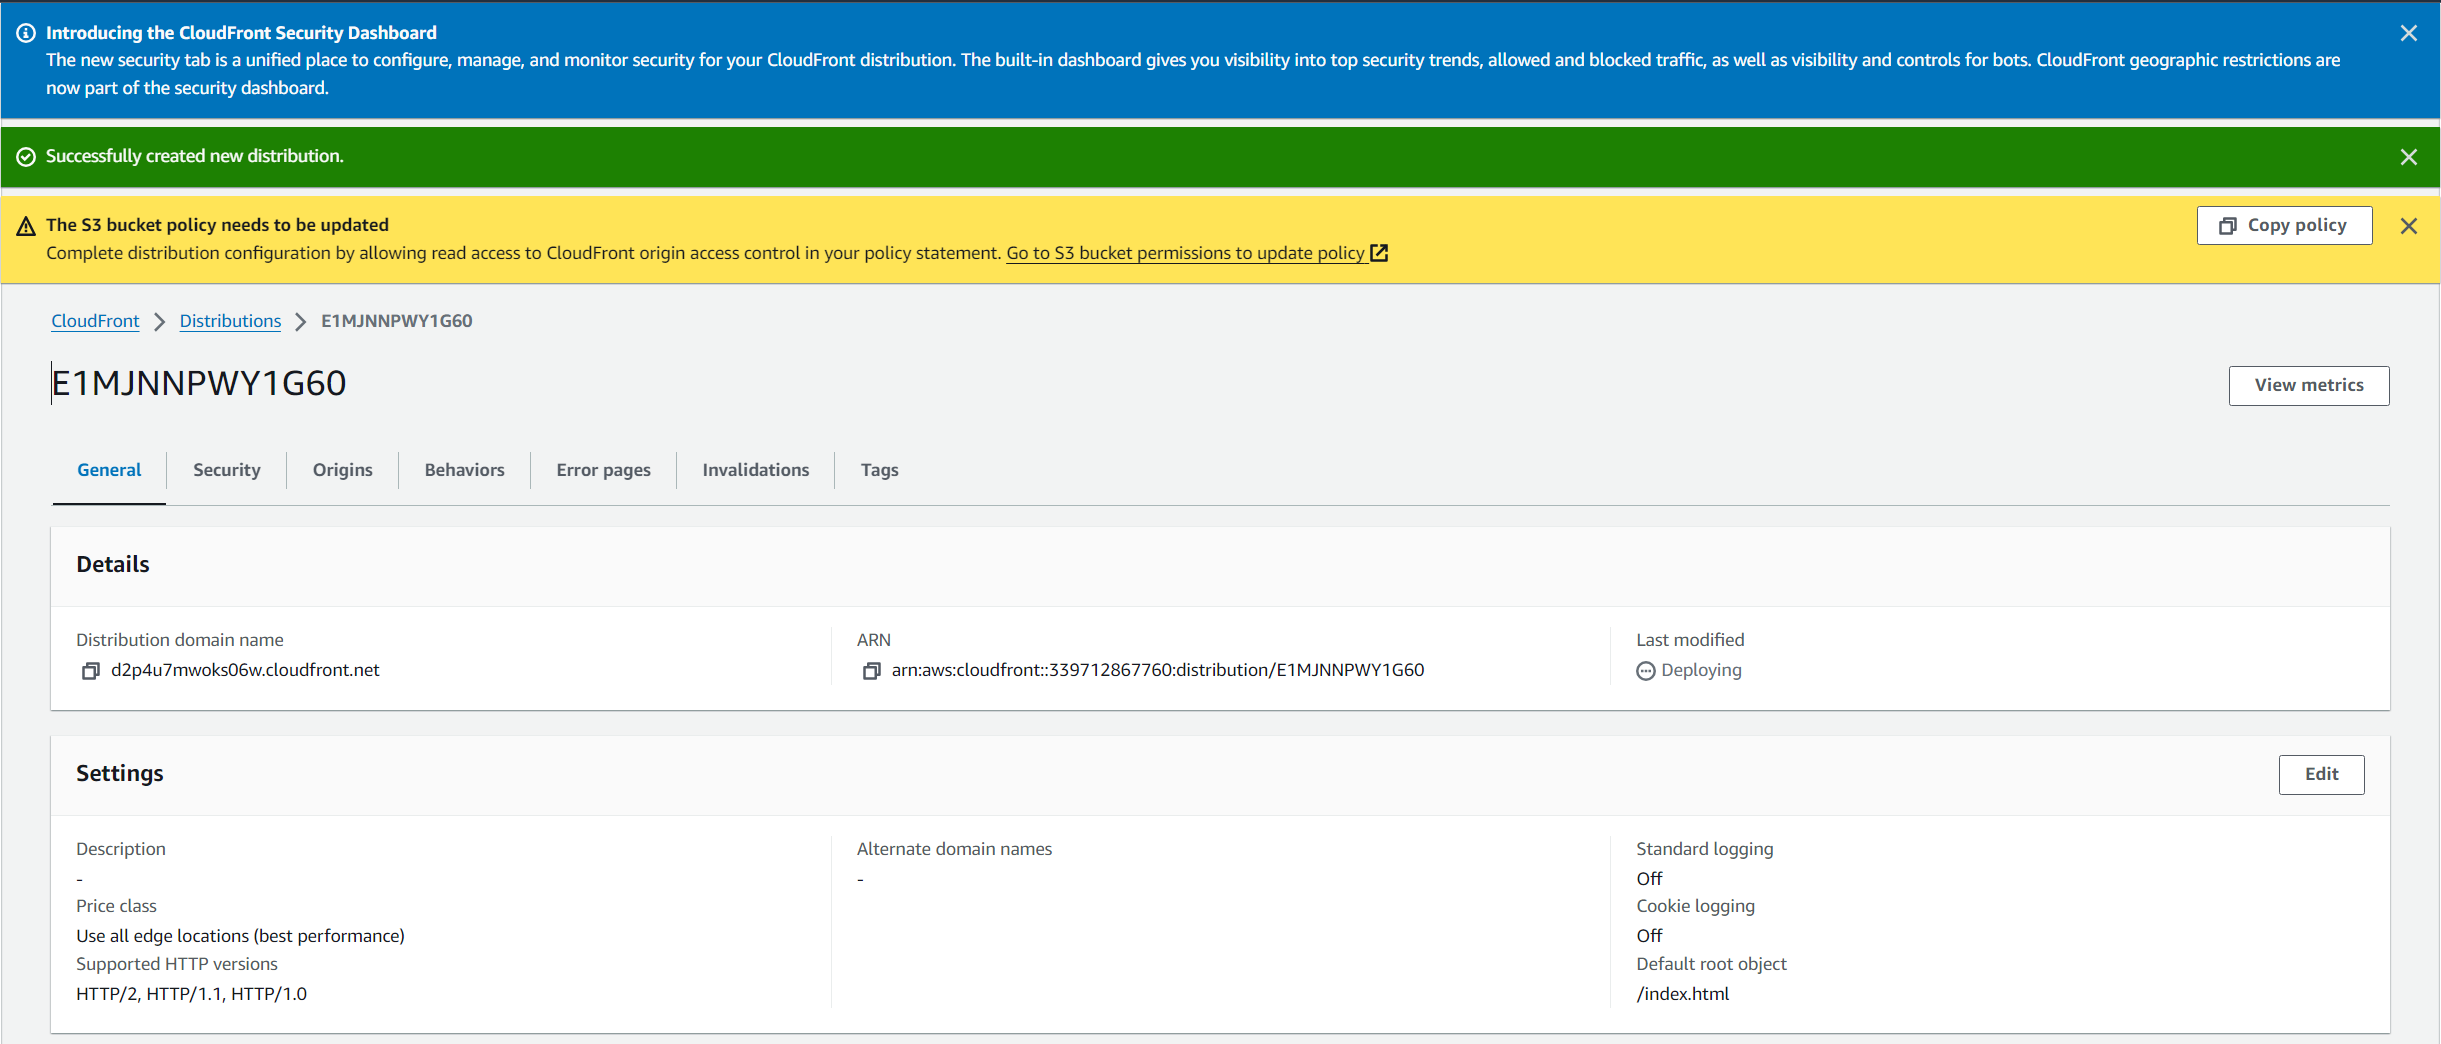
- Add /index.html to “Default root Object” field and click create distribution.

- When the distribution is created, you may receive a notification stating that The S3 bucket policy needs to be updated. In this case, click on the “Copy policies” button and add the copied policies to your S3 bucket’s policies.
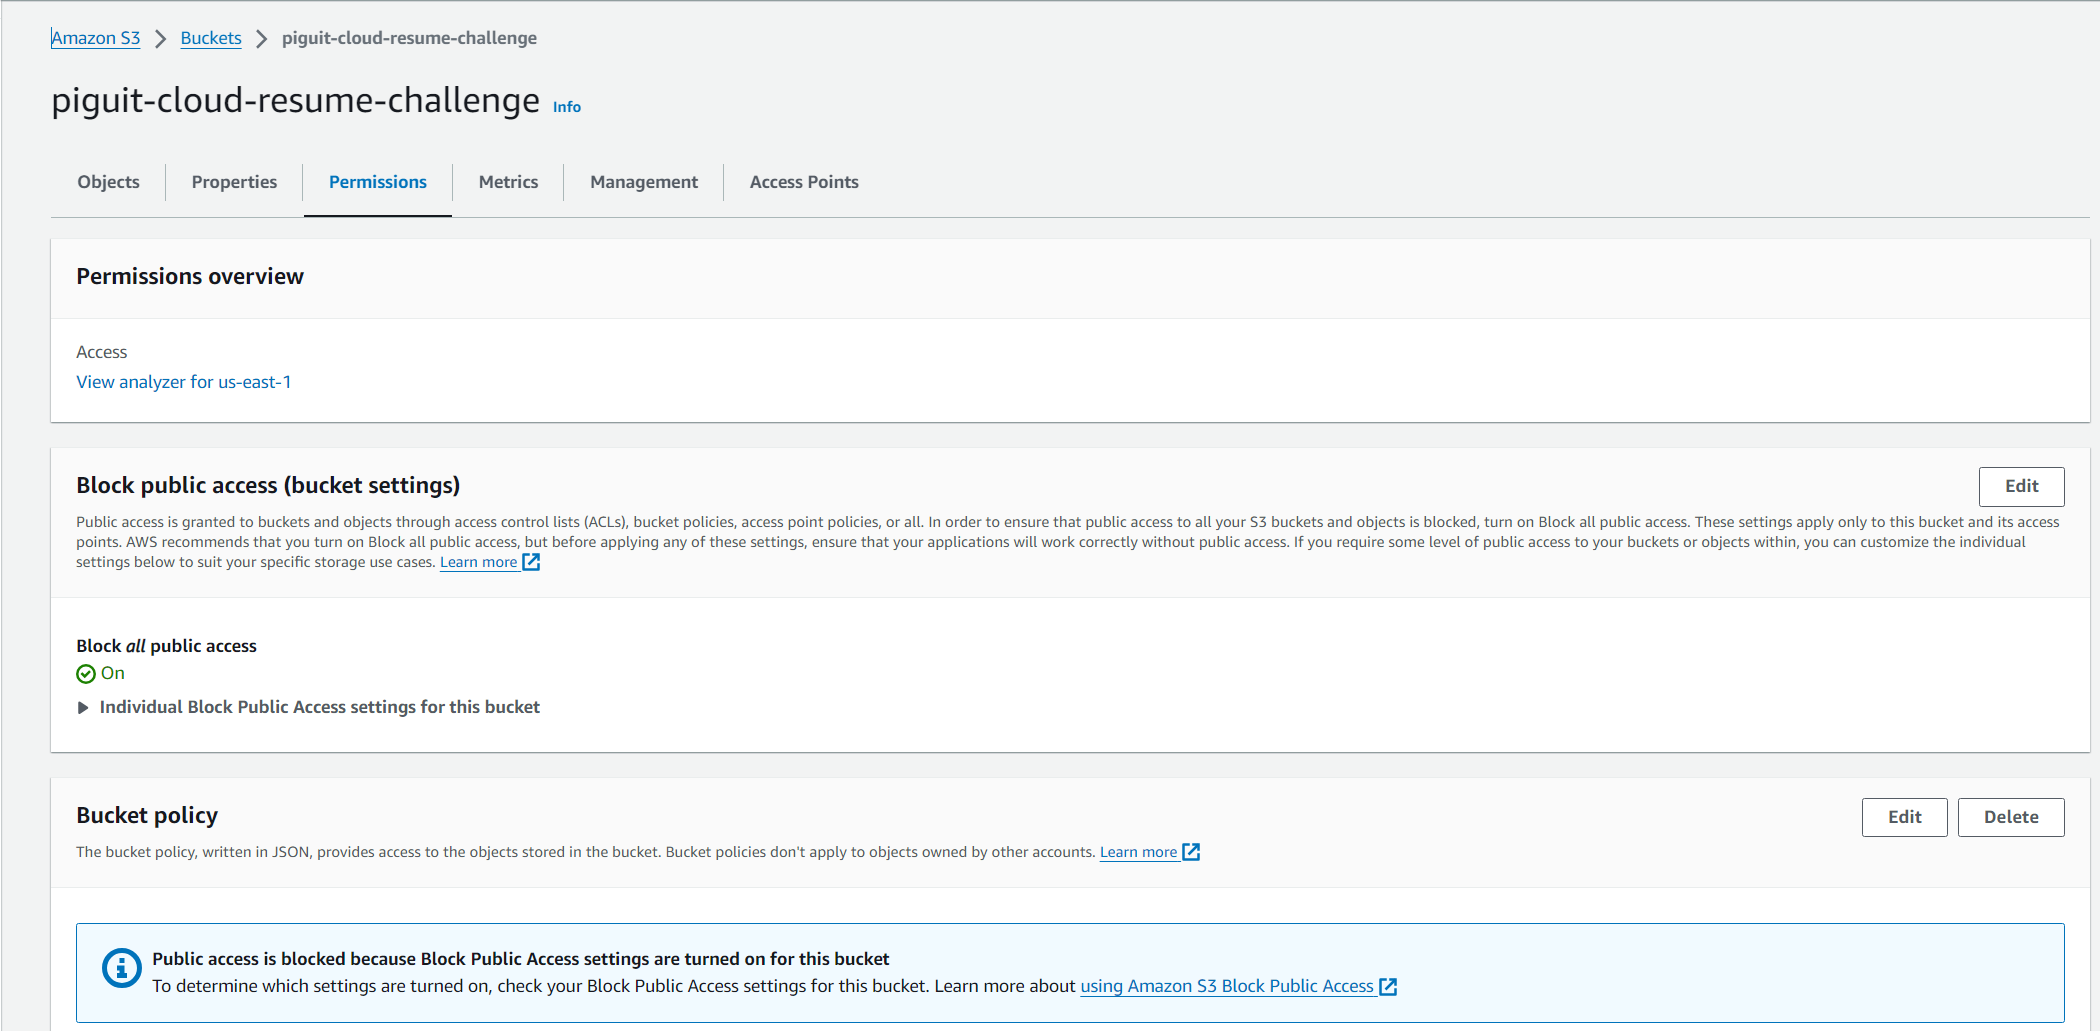
- Open the S3 bucket you created earlier and navigate to the “Permissions” tab. Scroll down to the “Bucket Policies” section and click on the “Edit” button.
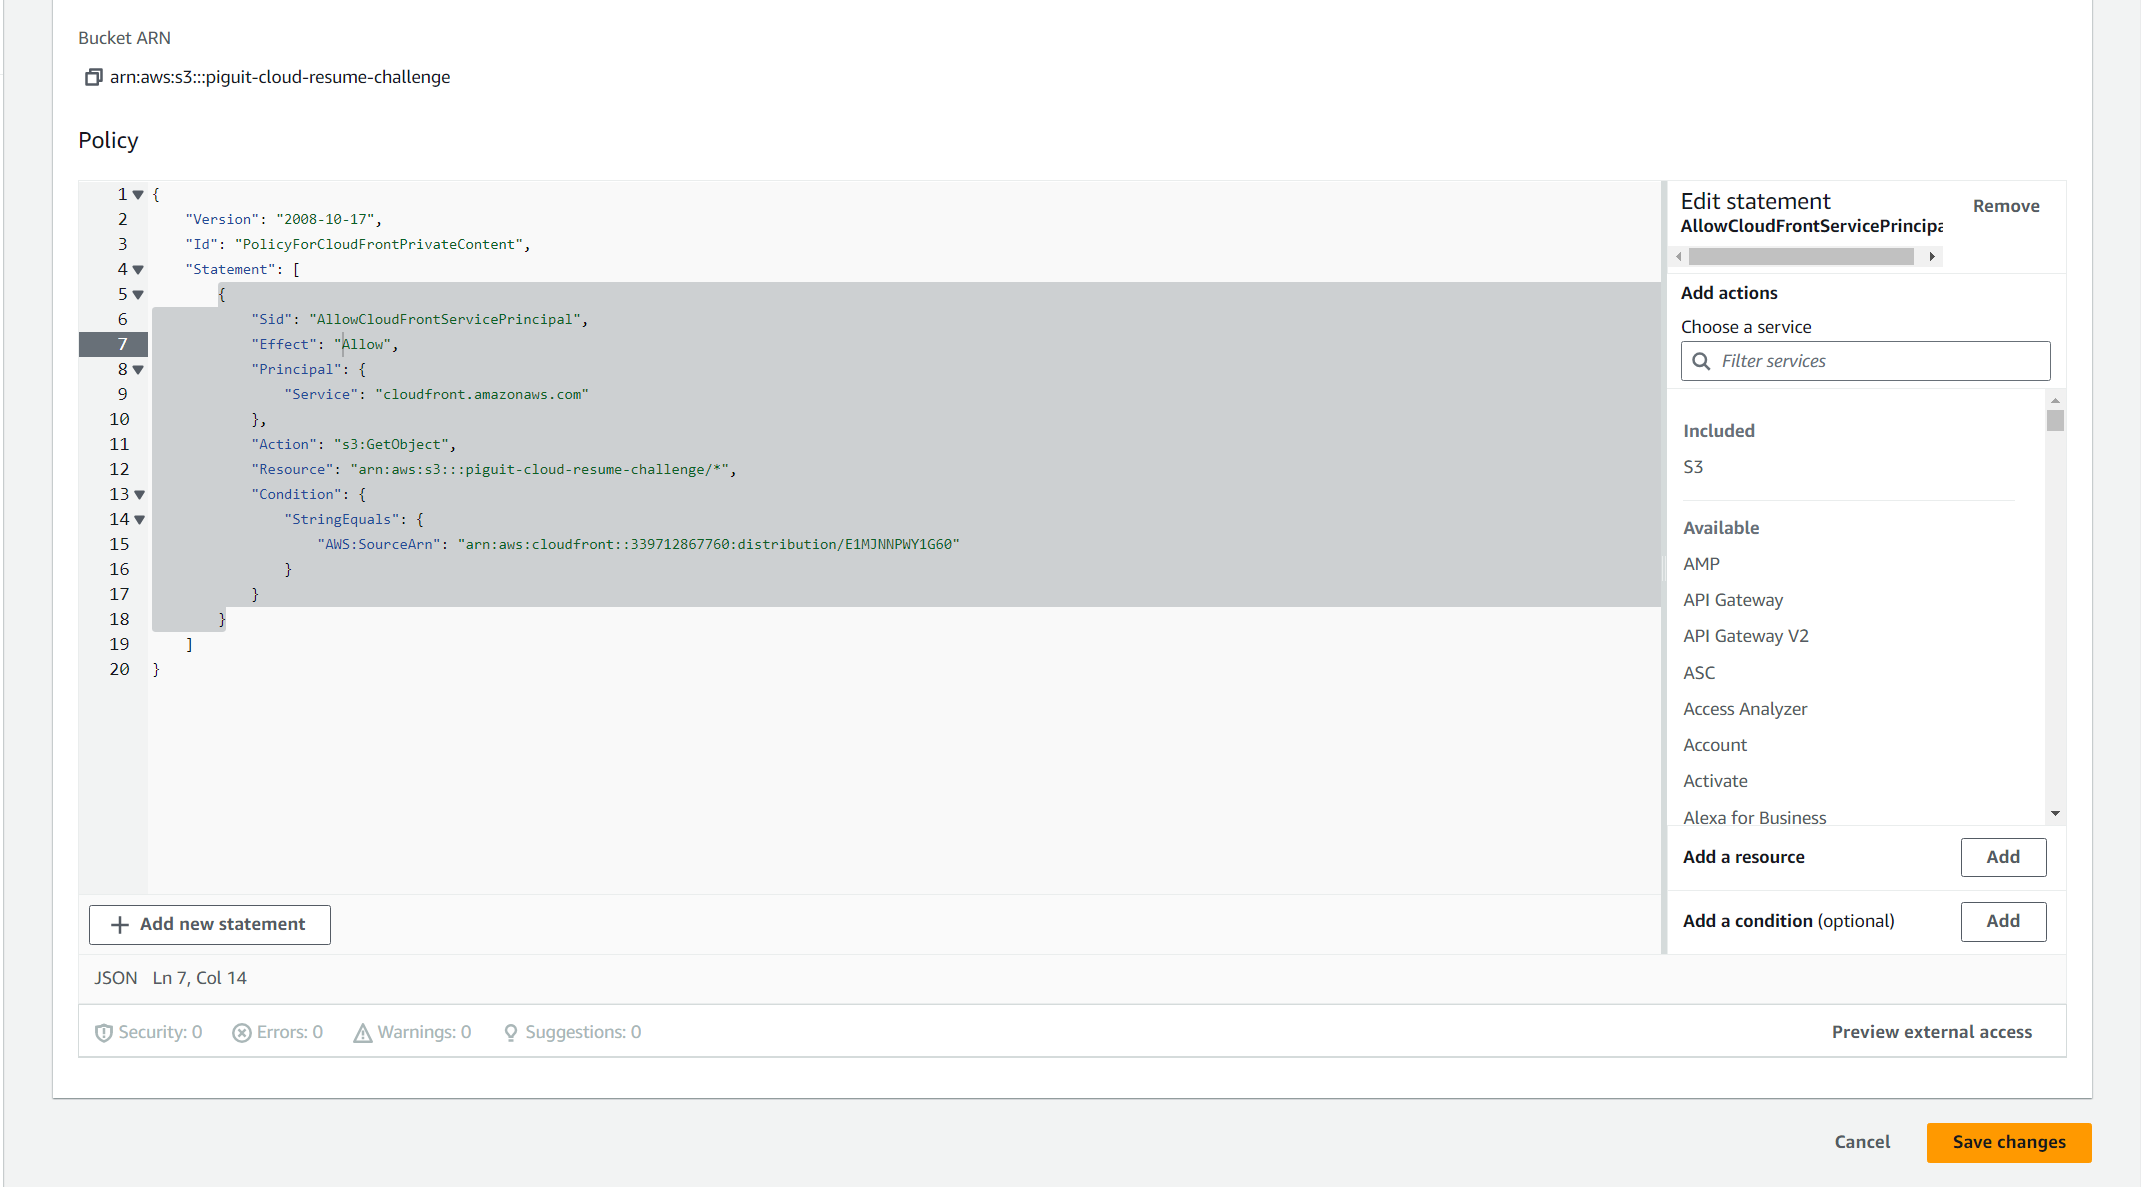
- Paste your policies and click on “Save changes”
- Go to your CloudFront distribution “Error pages” tab and create error responses for 403 and 404.


- Back in the General tab, under Details section you can see a Distribution domain name, you can now copy and paste that link into your browser to see your website
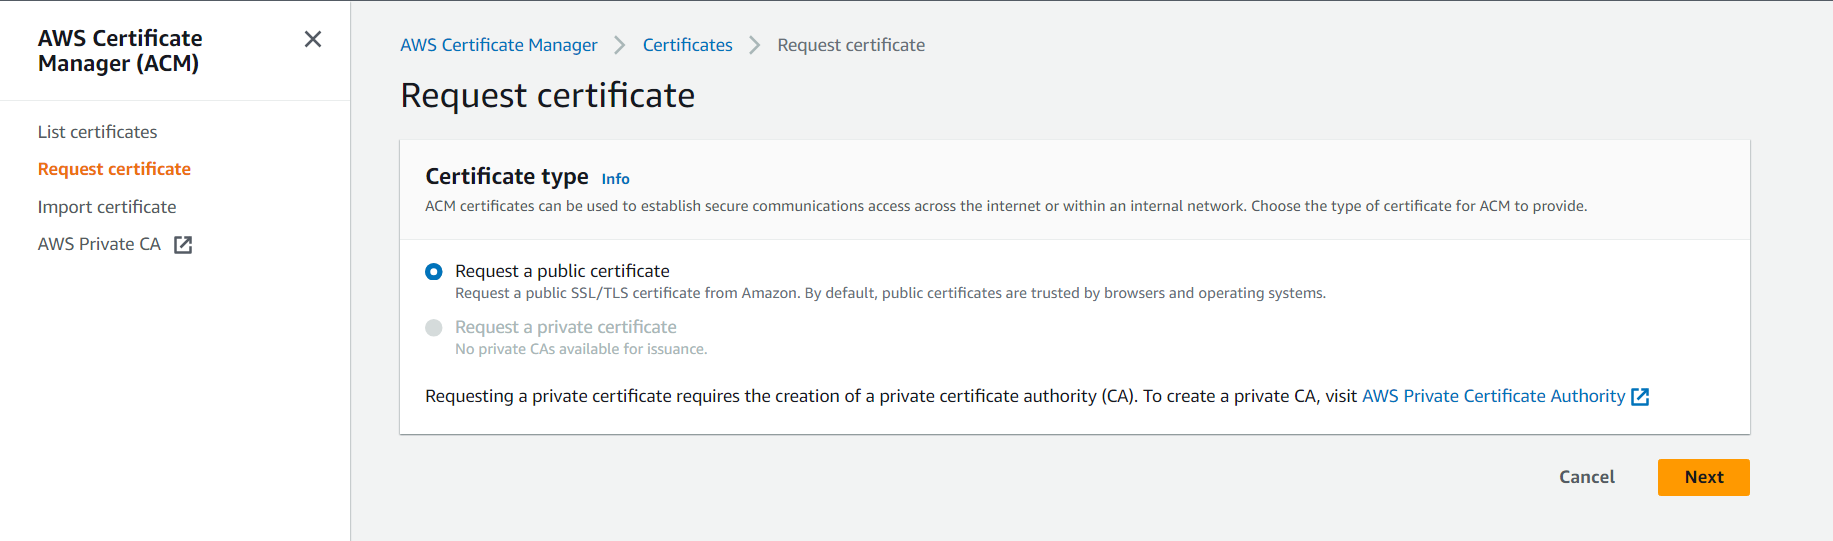
SSL Certificate
- Navigate to AWS Certificate Manager (ACM) and select request
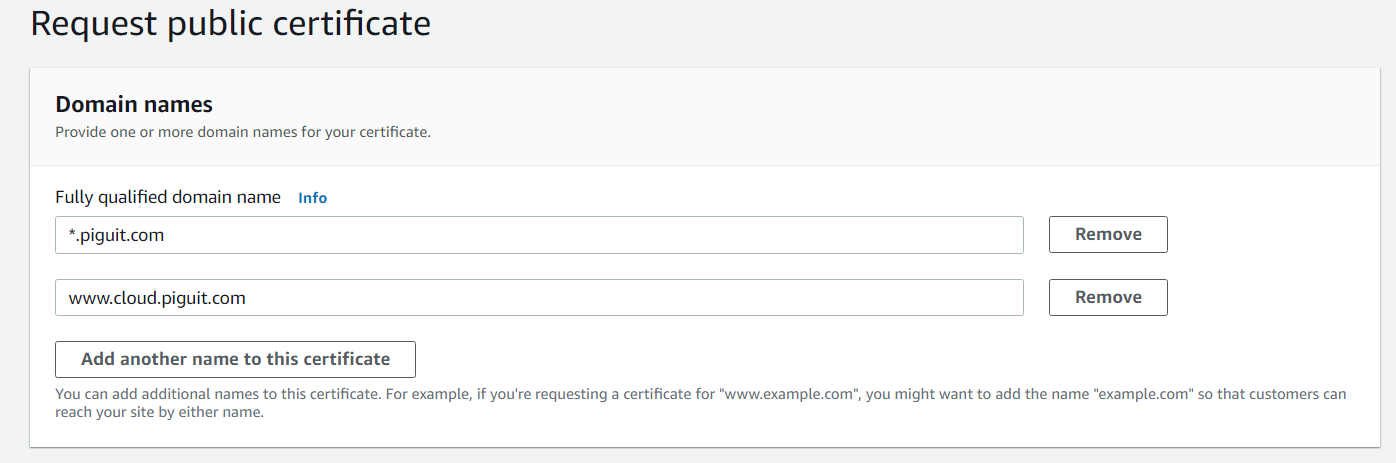
- Click on “Next” and proceed to fill your domain name

- In this case, I am requesting a wildcard certificate
- A SSL/TLS Wildcard certificate is a single certificate with a wildcard character (*) in the domain name field. This allows the certificate to secure multiple sub domain names (hosts) pertaining to the same base domain.
- For example, a wildcard certificate for *.(domainname).com, could be used for www.(domainname).com, mail.(domainname).com, store.(domainname).com, in addition to any additional sub domain name in the (domainname).com.
- For the validation method, I am using email validation because it is easier for me

- “Request” button to get your certificate
- In my case I received an email to verify the SSL certificate
- After awhile you should see the status changed to Issued

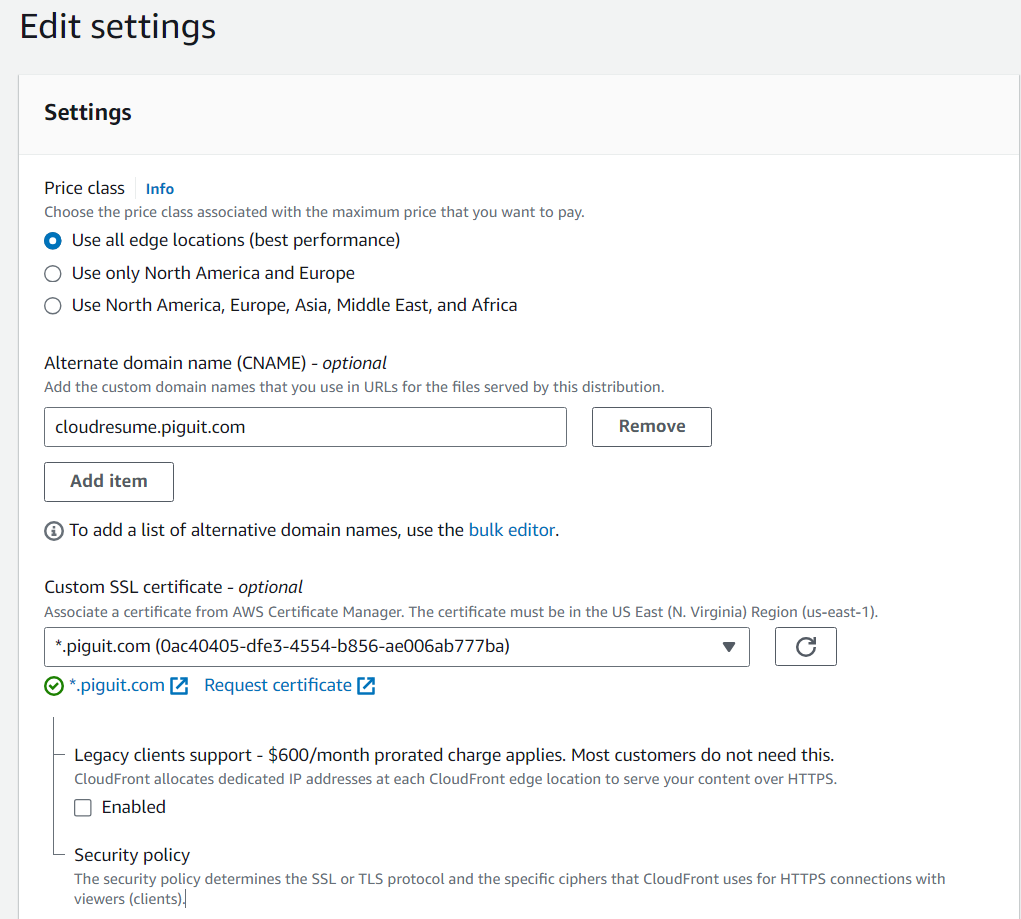
- Navigate back to your Cloudfront distribution to add the SSL certificate and alternate domain name (CNAME) record under general tab, section settings, and select edit
- Add the alternate domain name you like
- Add the SSL certificate
- Select save changes
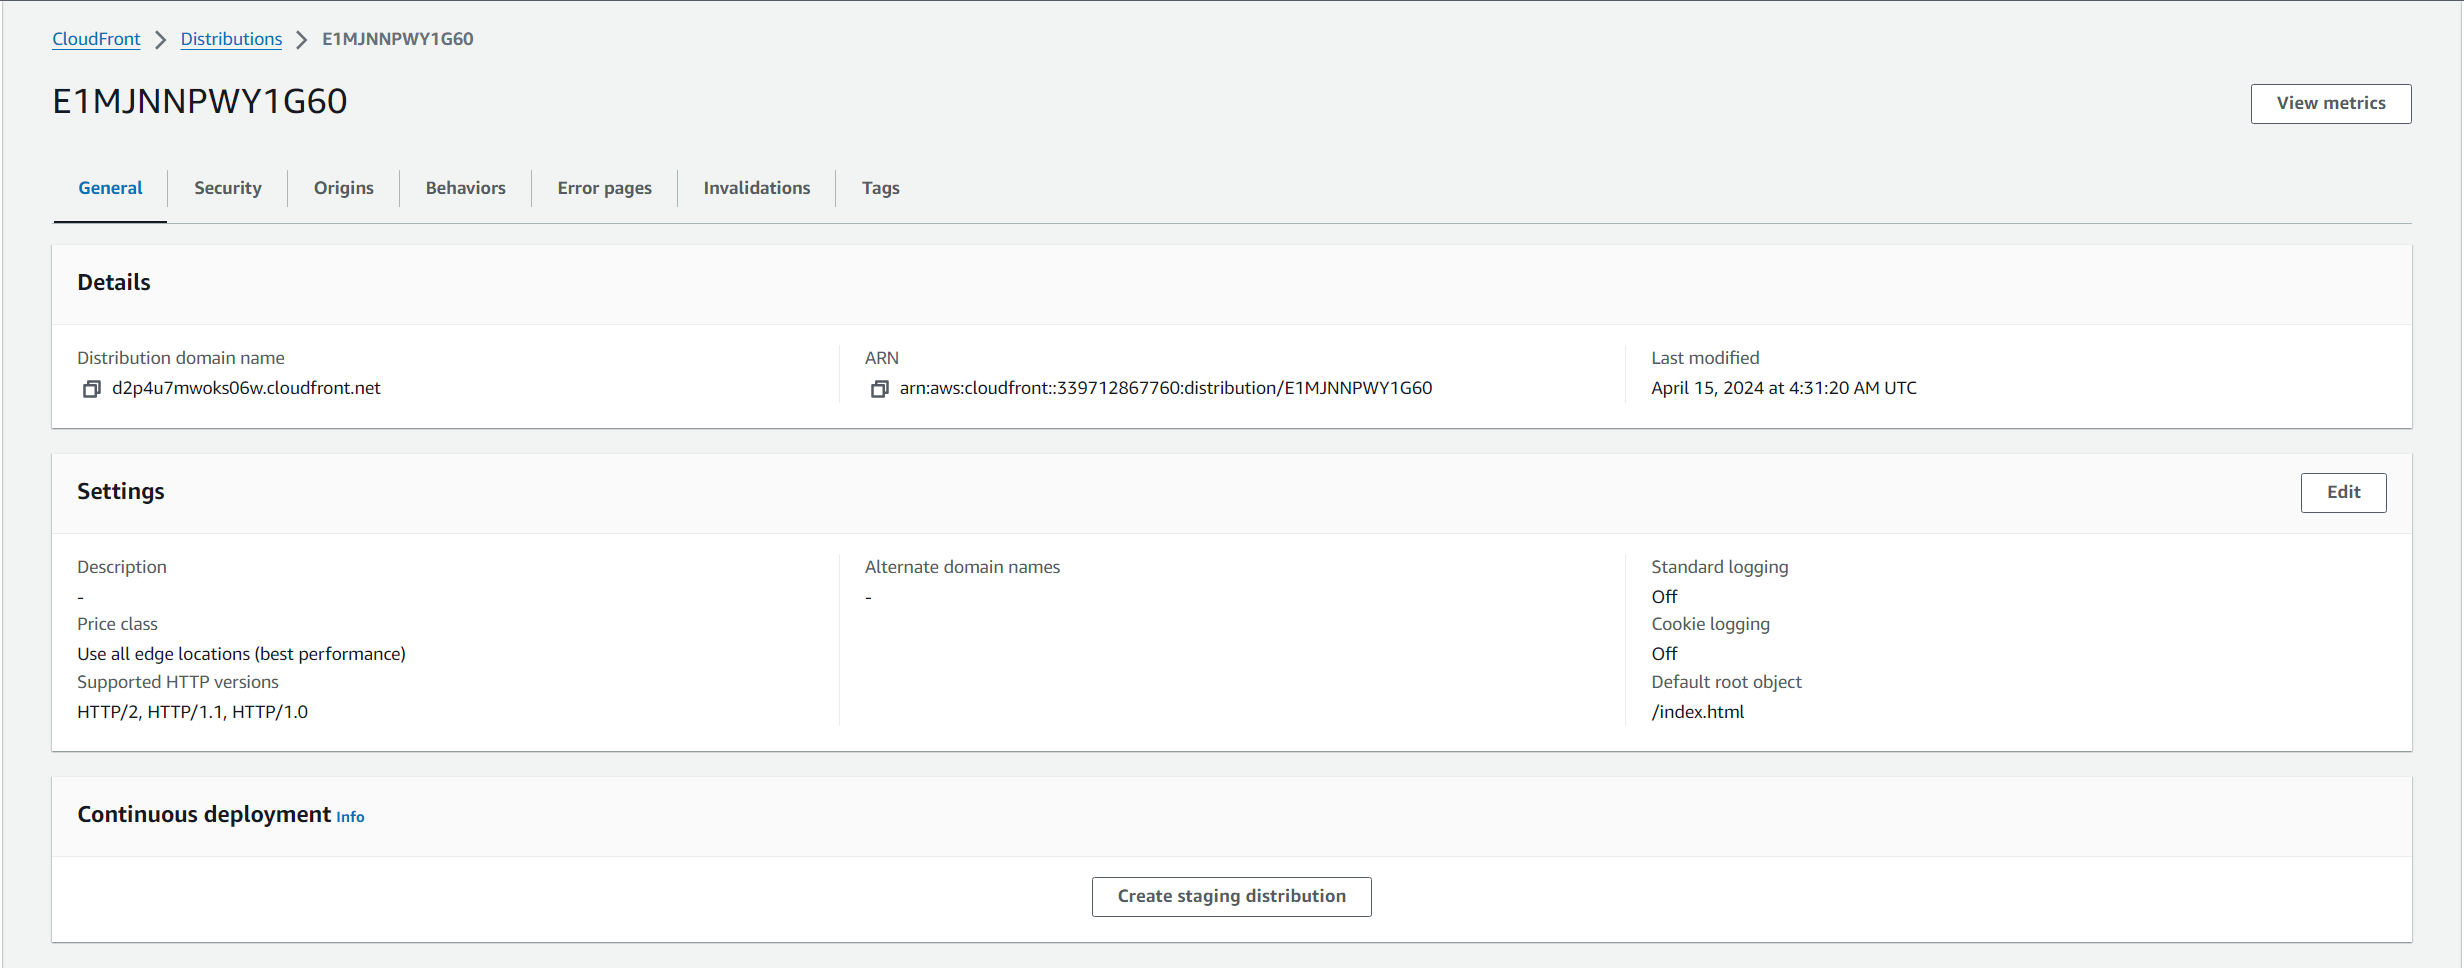
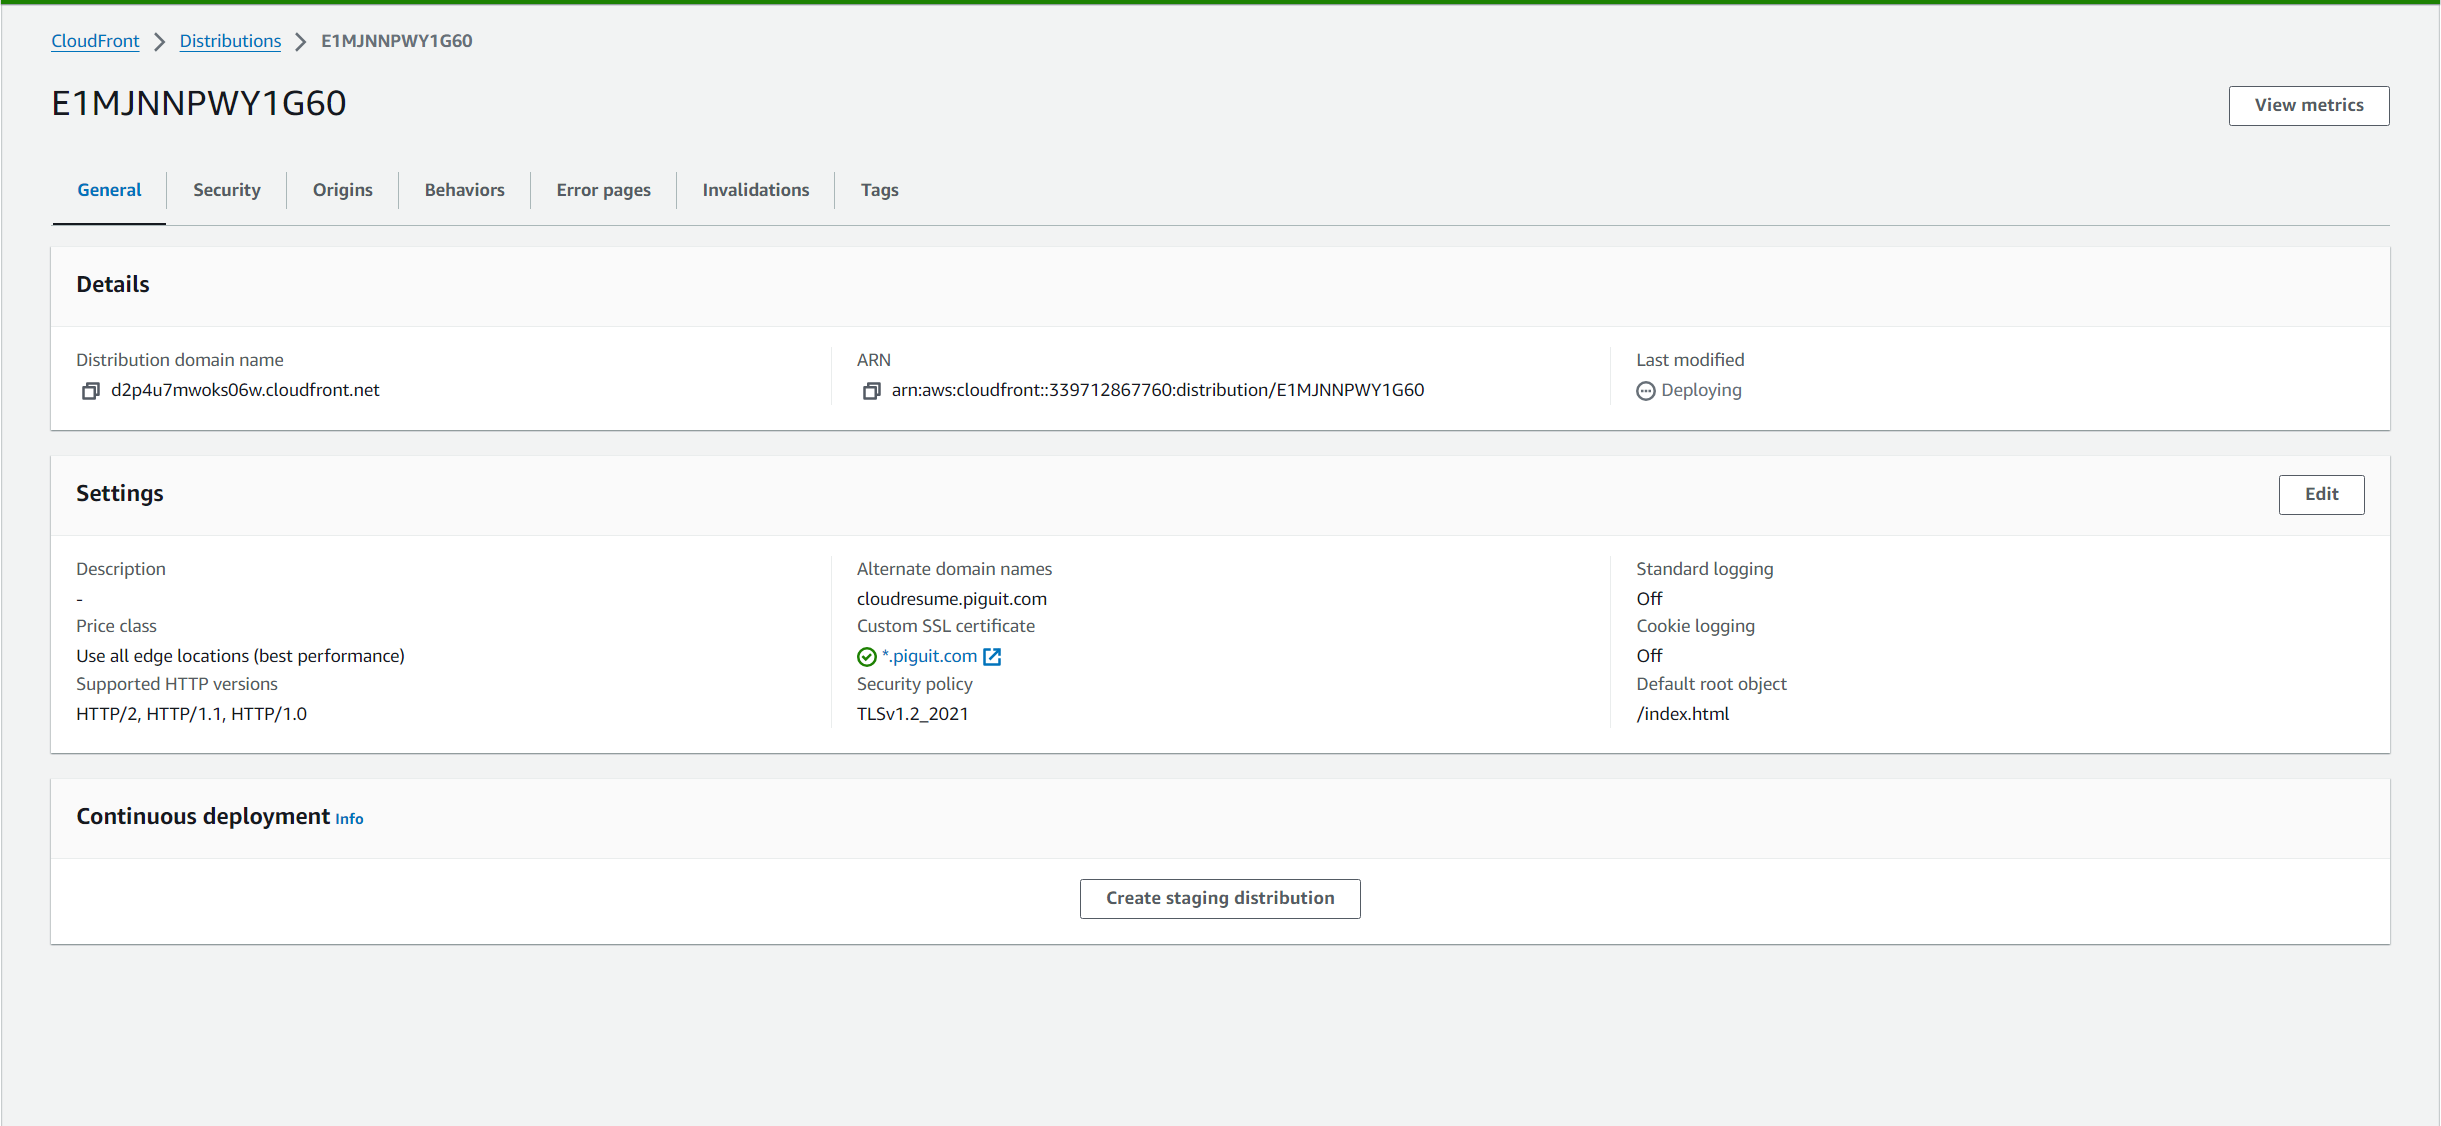
- You should see that your cloudfront distribution settings updated with the new alternate domain names and custom ssl certificate
Route53 DNS management
-
Setup Route 53, Amazon’s DNS service
- If you purchased the domain on NameCheap, you would have to set up and configure the necessary Name Server (NS) records on the NameCheap side
- By seamlessly integrating Route 53 with Namecheap, we can efficiently manage our DNS settings and ensure proper routing of traffic to our hosted resources.
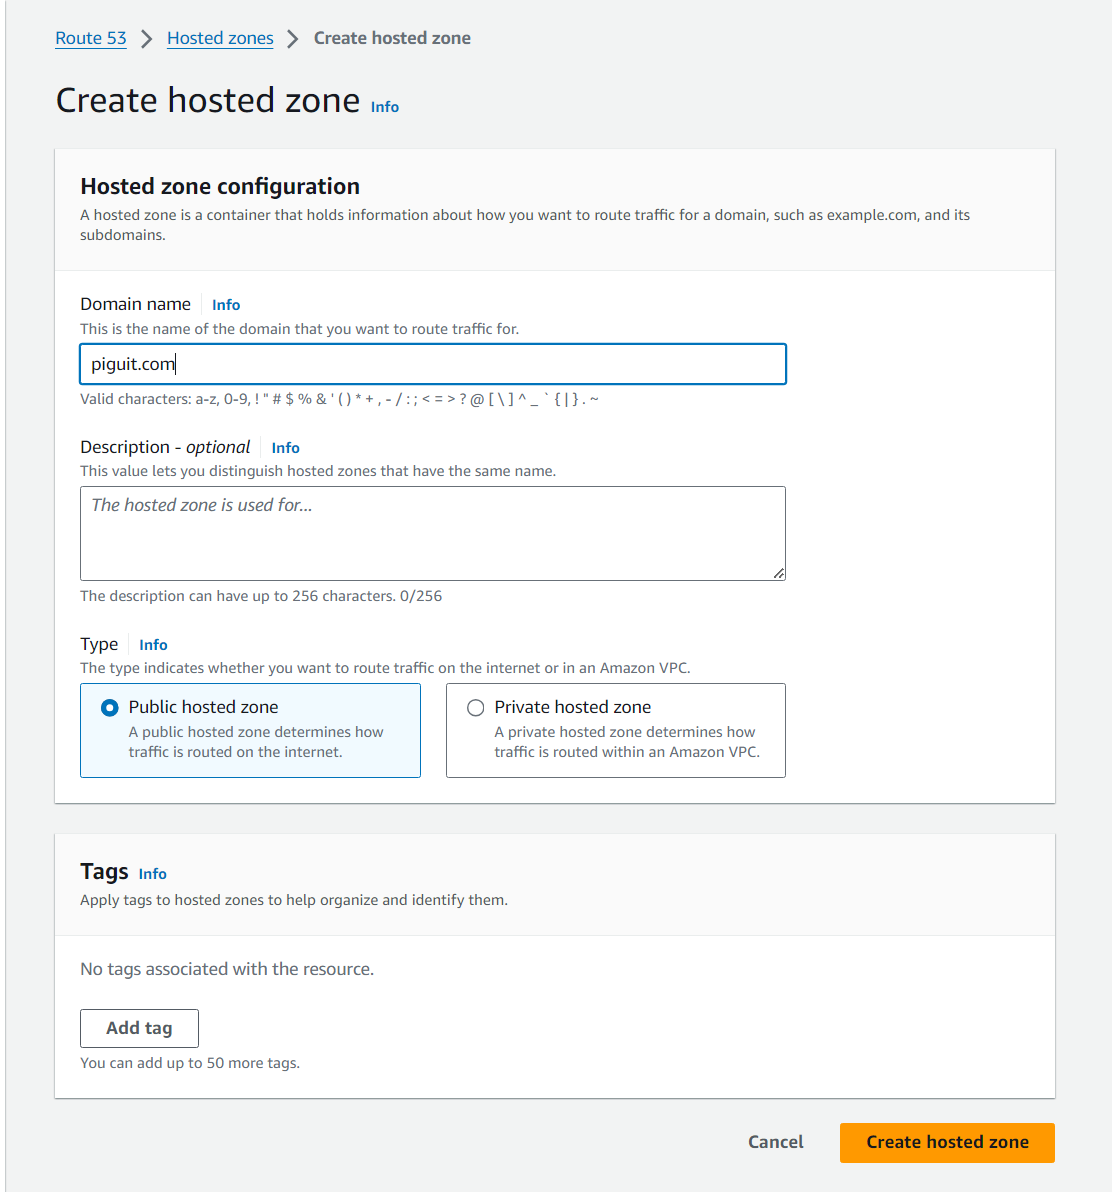
- To begin, navigate to the Route 53 service in your AWS console and click on “Create hosted zone”. This will initiate the process of setting up a hosted zone where you can manage the DNS records for your domain.
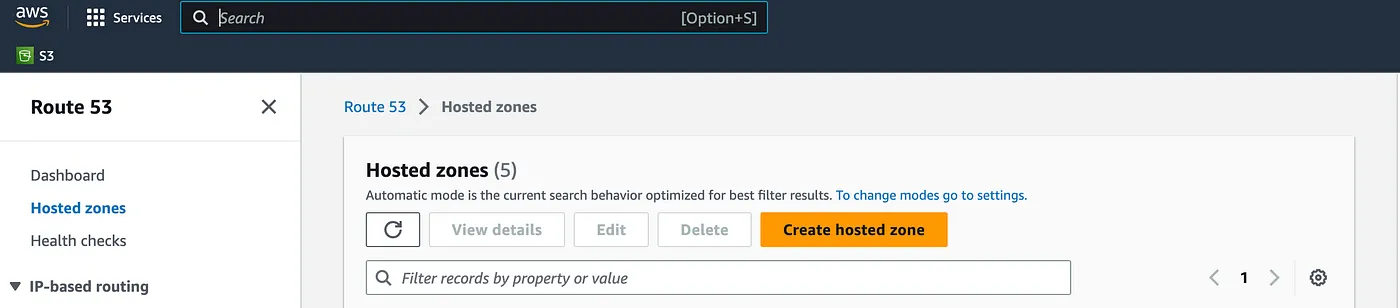
- Enter your domain name in the “Domain Name” field and click on “Create hosted zone”
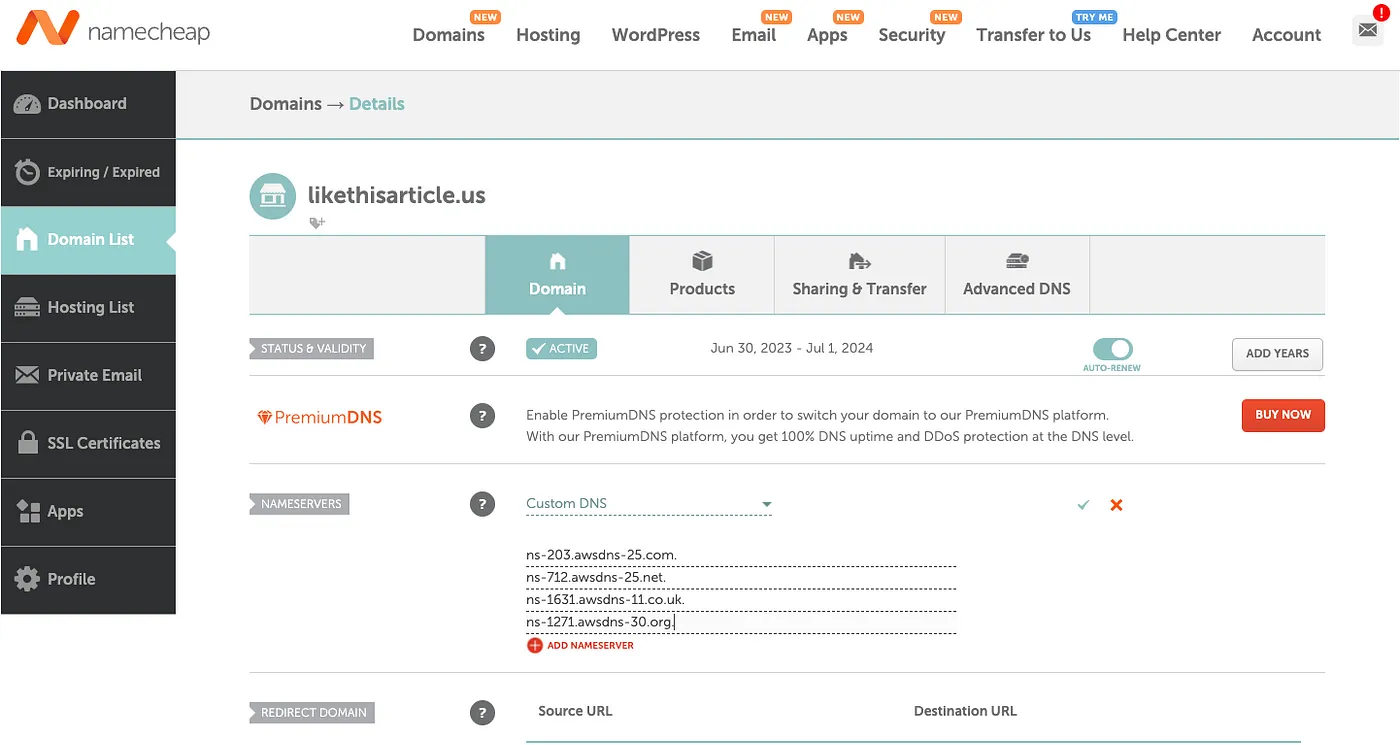
- To configure NS records in Namecheap, you need to copy the NS records from your hosted zone in Route 53 and update the DNS settings in your Namecheap account by replacing the existing NS records with the ones obtained from Route 53

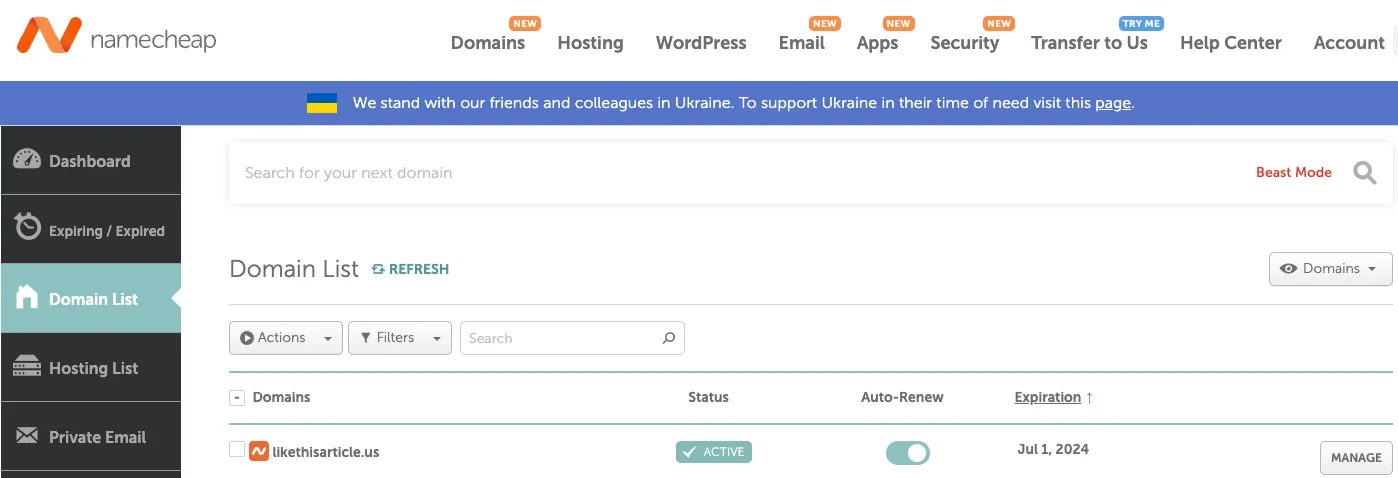
- Back in your NameCheap portal, in the “Domain List” section, click on “Manage” located on the right side, opposite to your domain.
- In the “Nameservers” section of the Namecheap DNS management interface, select the option for custom DNS and enter your NS records.
- Don’t forget to save your records click on green mark
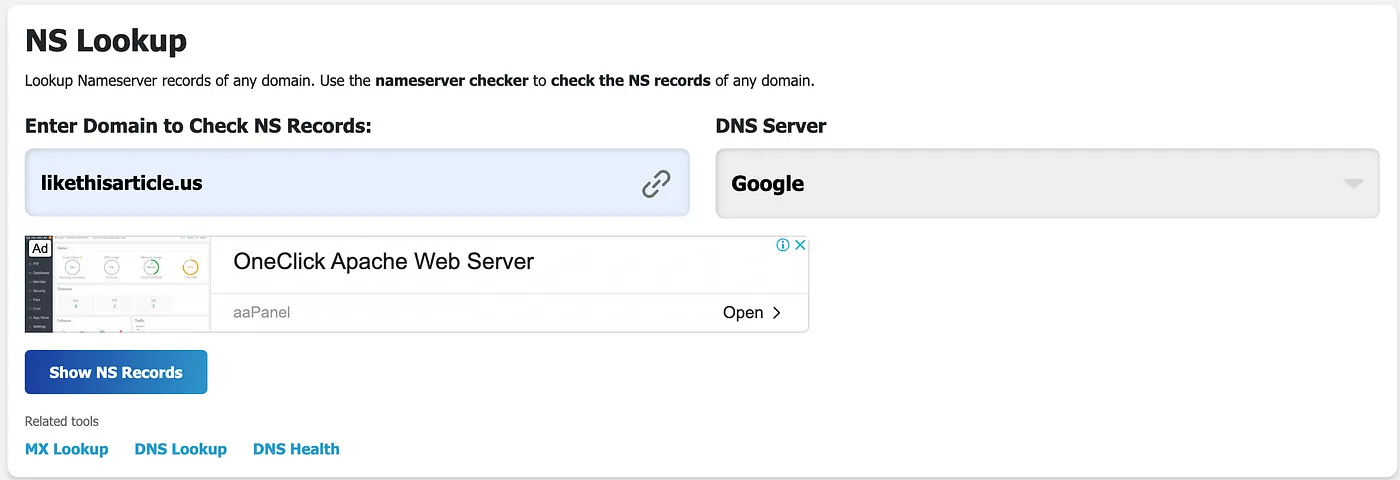
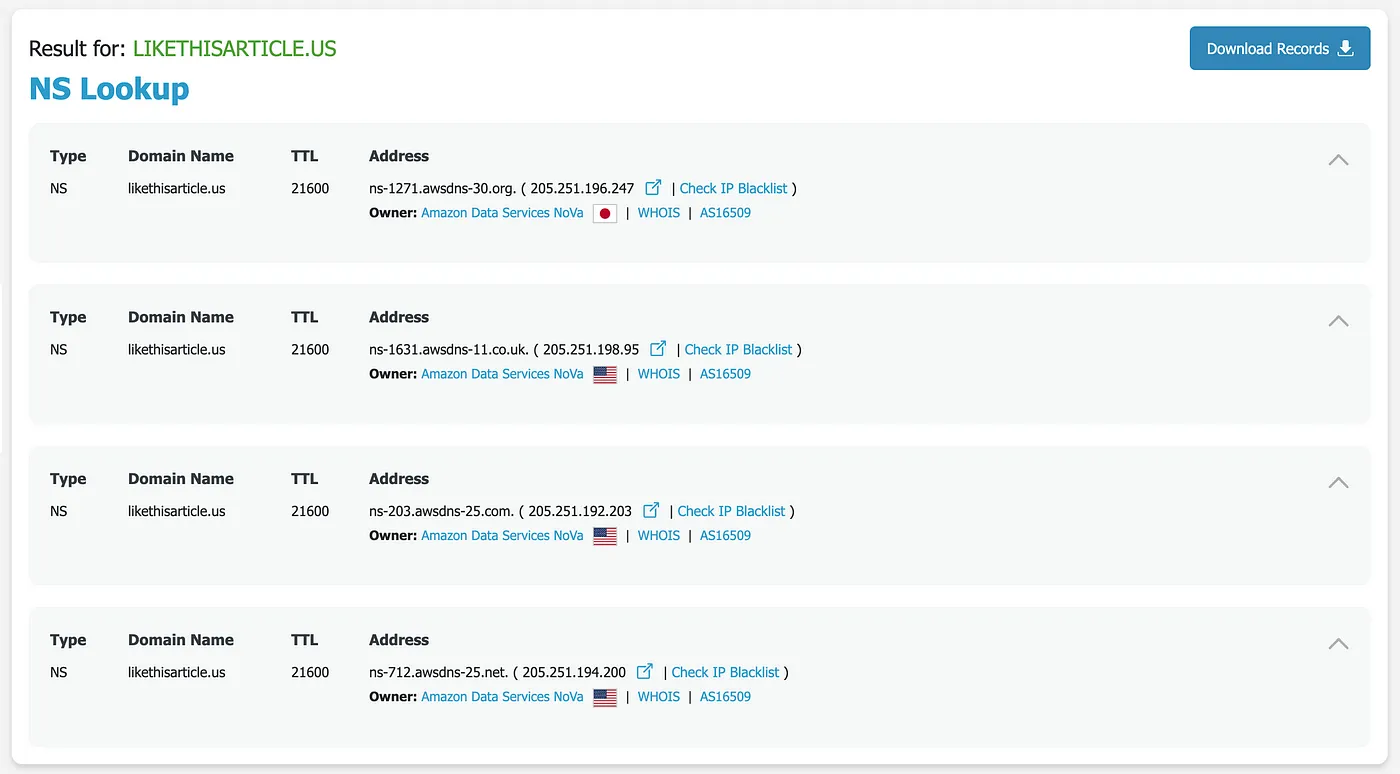
- We can verify this later using a website like dnschecker to confirm the correctness of the NS record configuration.
- Next step is to create an A record in our hosted zone. Navigate to the hosted zone section in Route53 to proceed
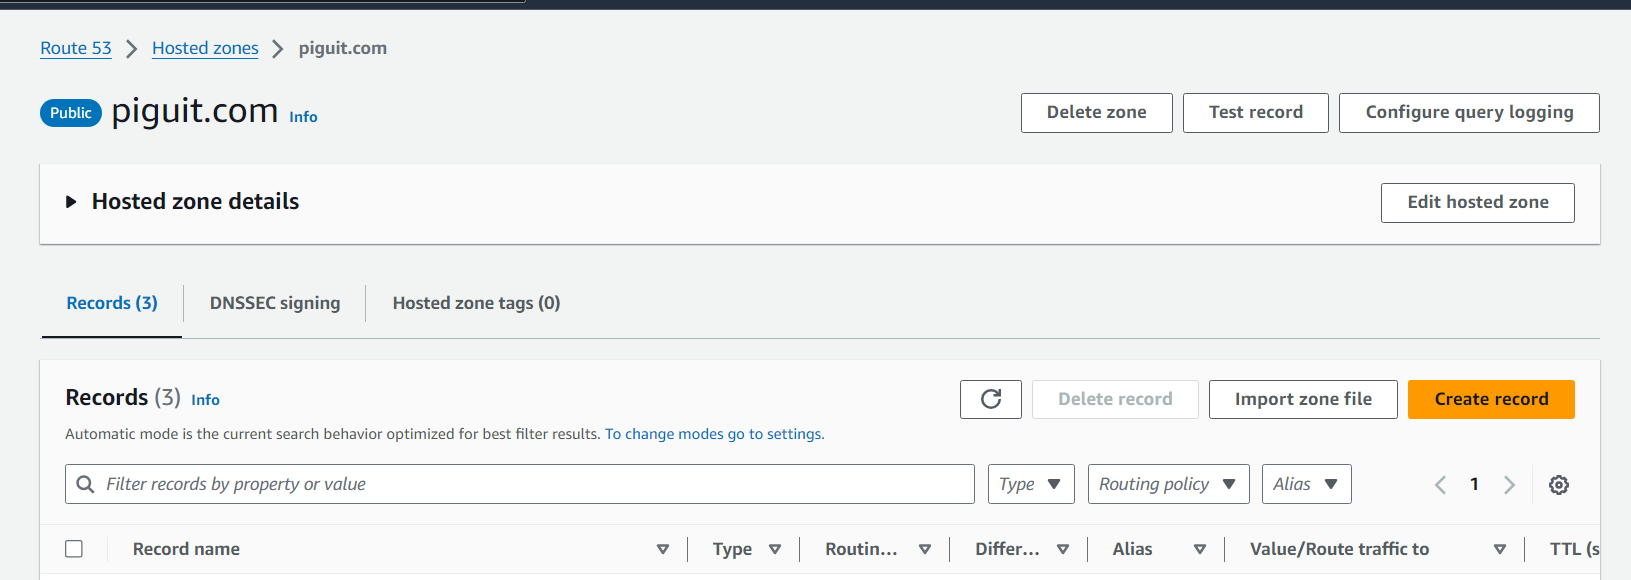
- Click on “Create Record”.
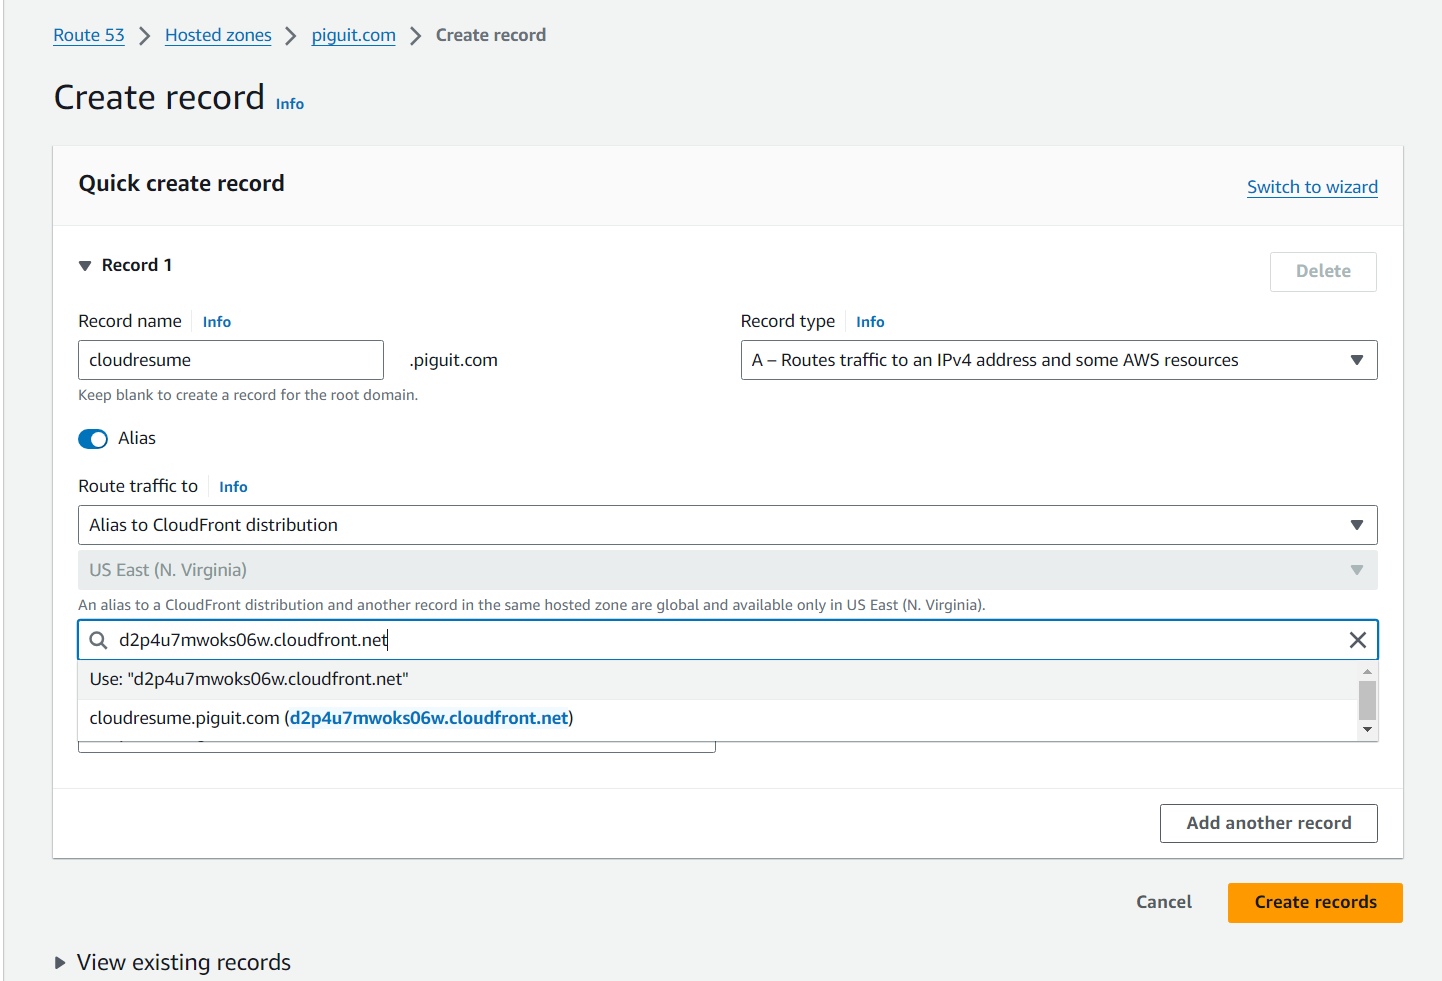
- Input subdomain name if you have one
- Record type is — A. Set Alias toggle, and select your distribution that you created above from the search field.
- Click on “Create Record”.
-
Your website should be able to be reached at the record name, for my case it would be at cloudresume.piguit.com
-
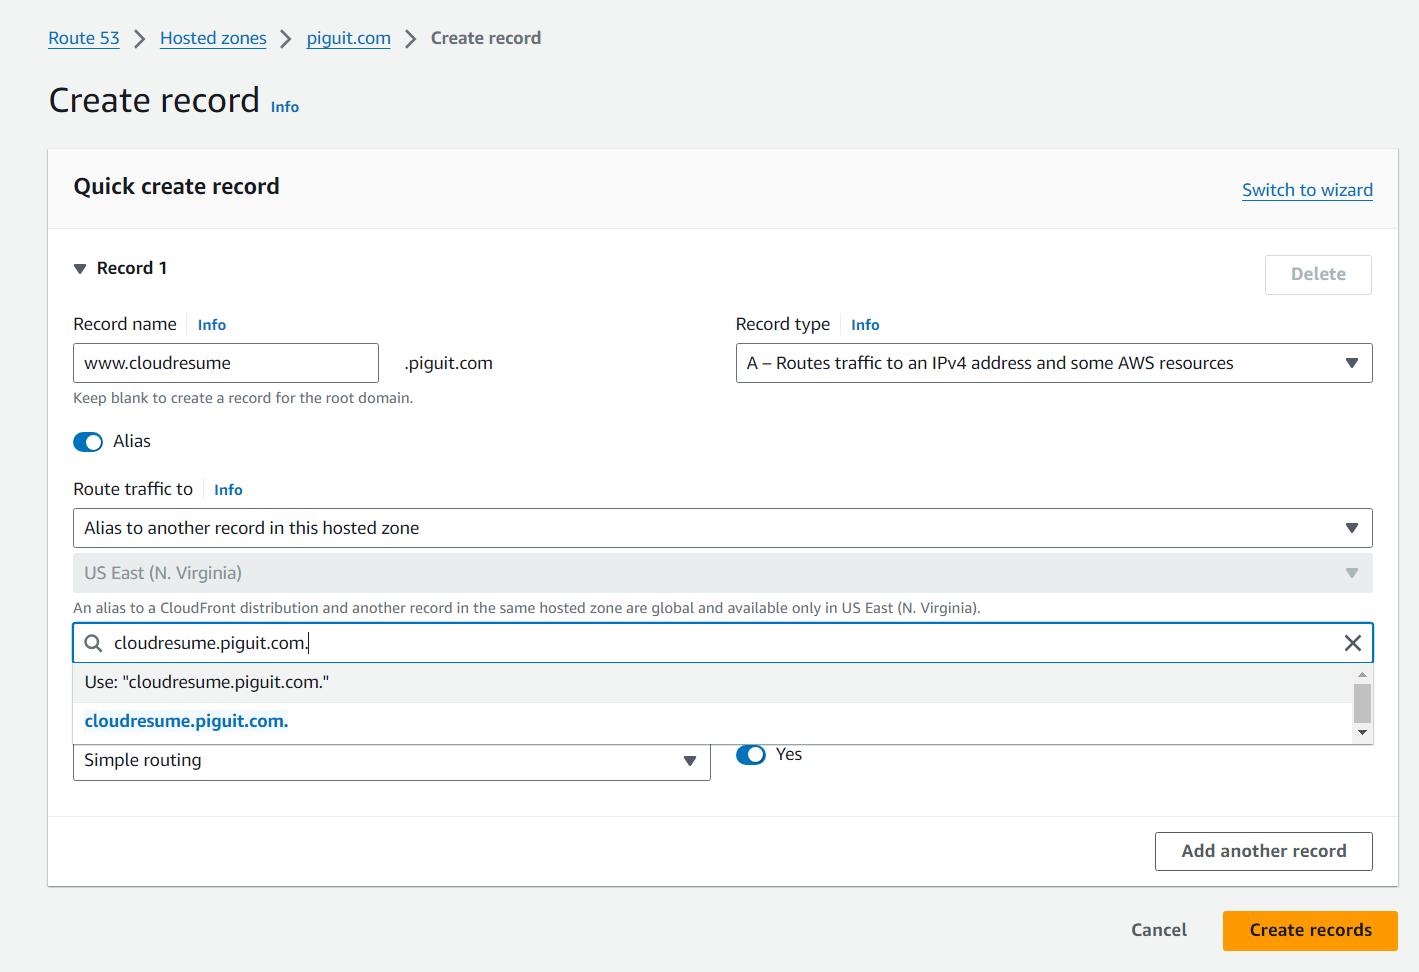
You can add additional subdomains that points to this A record, for example you may want to enable www.cloudresume.piguit.com
- Remember to add the additional certificate for each additional subdomains you want to your cloud distribution, with AWS ACM, you can add multiple certificates in one request
- This step will take some time to load
Javascript - Visitor counter

- To set up a visitors counter, we need four things:
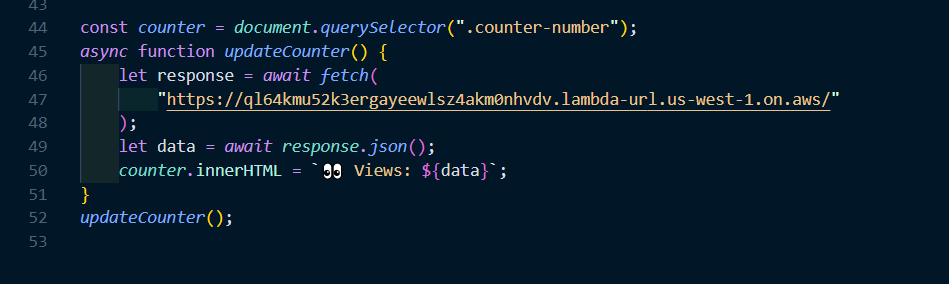
- Javascript code to display the counter
- Javascript API call to fetch the data from AWS DynamoDB
- AWS Lambda function to update the table on DynamoDB
- First create a script.js file in your website repository, and add the script to fetch data from aws and display it
- Leave the fetch url blank for now until we create the lambda function on aws
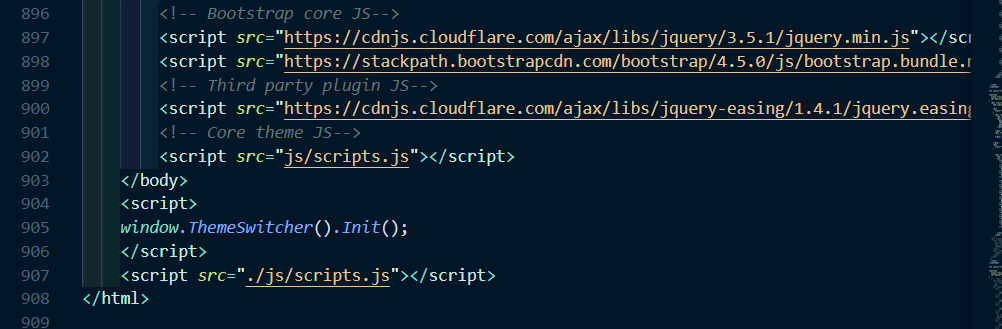
- Add a reference to your scripts.js in your index.html file
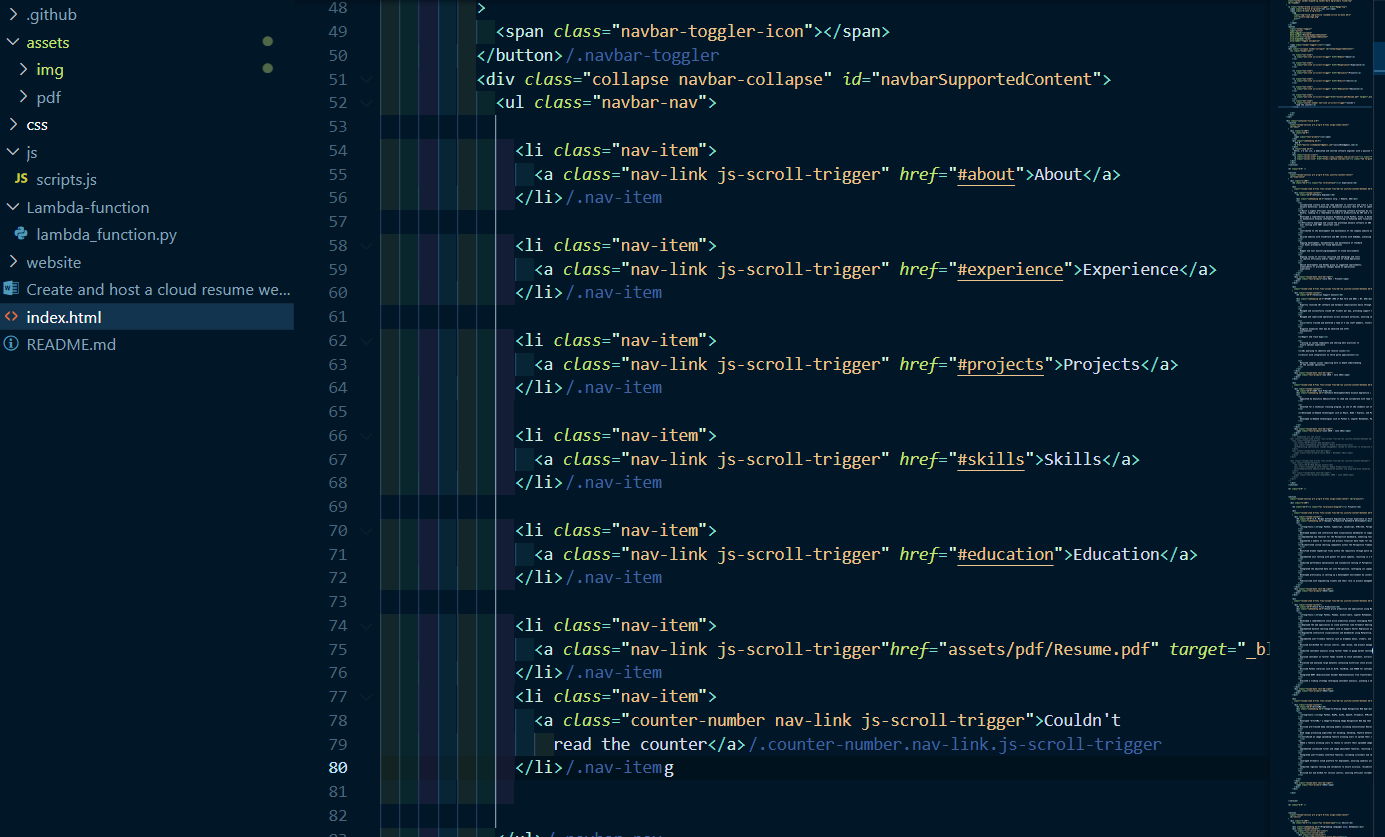
- Display the data in your html
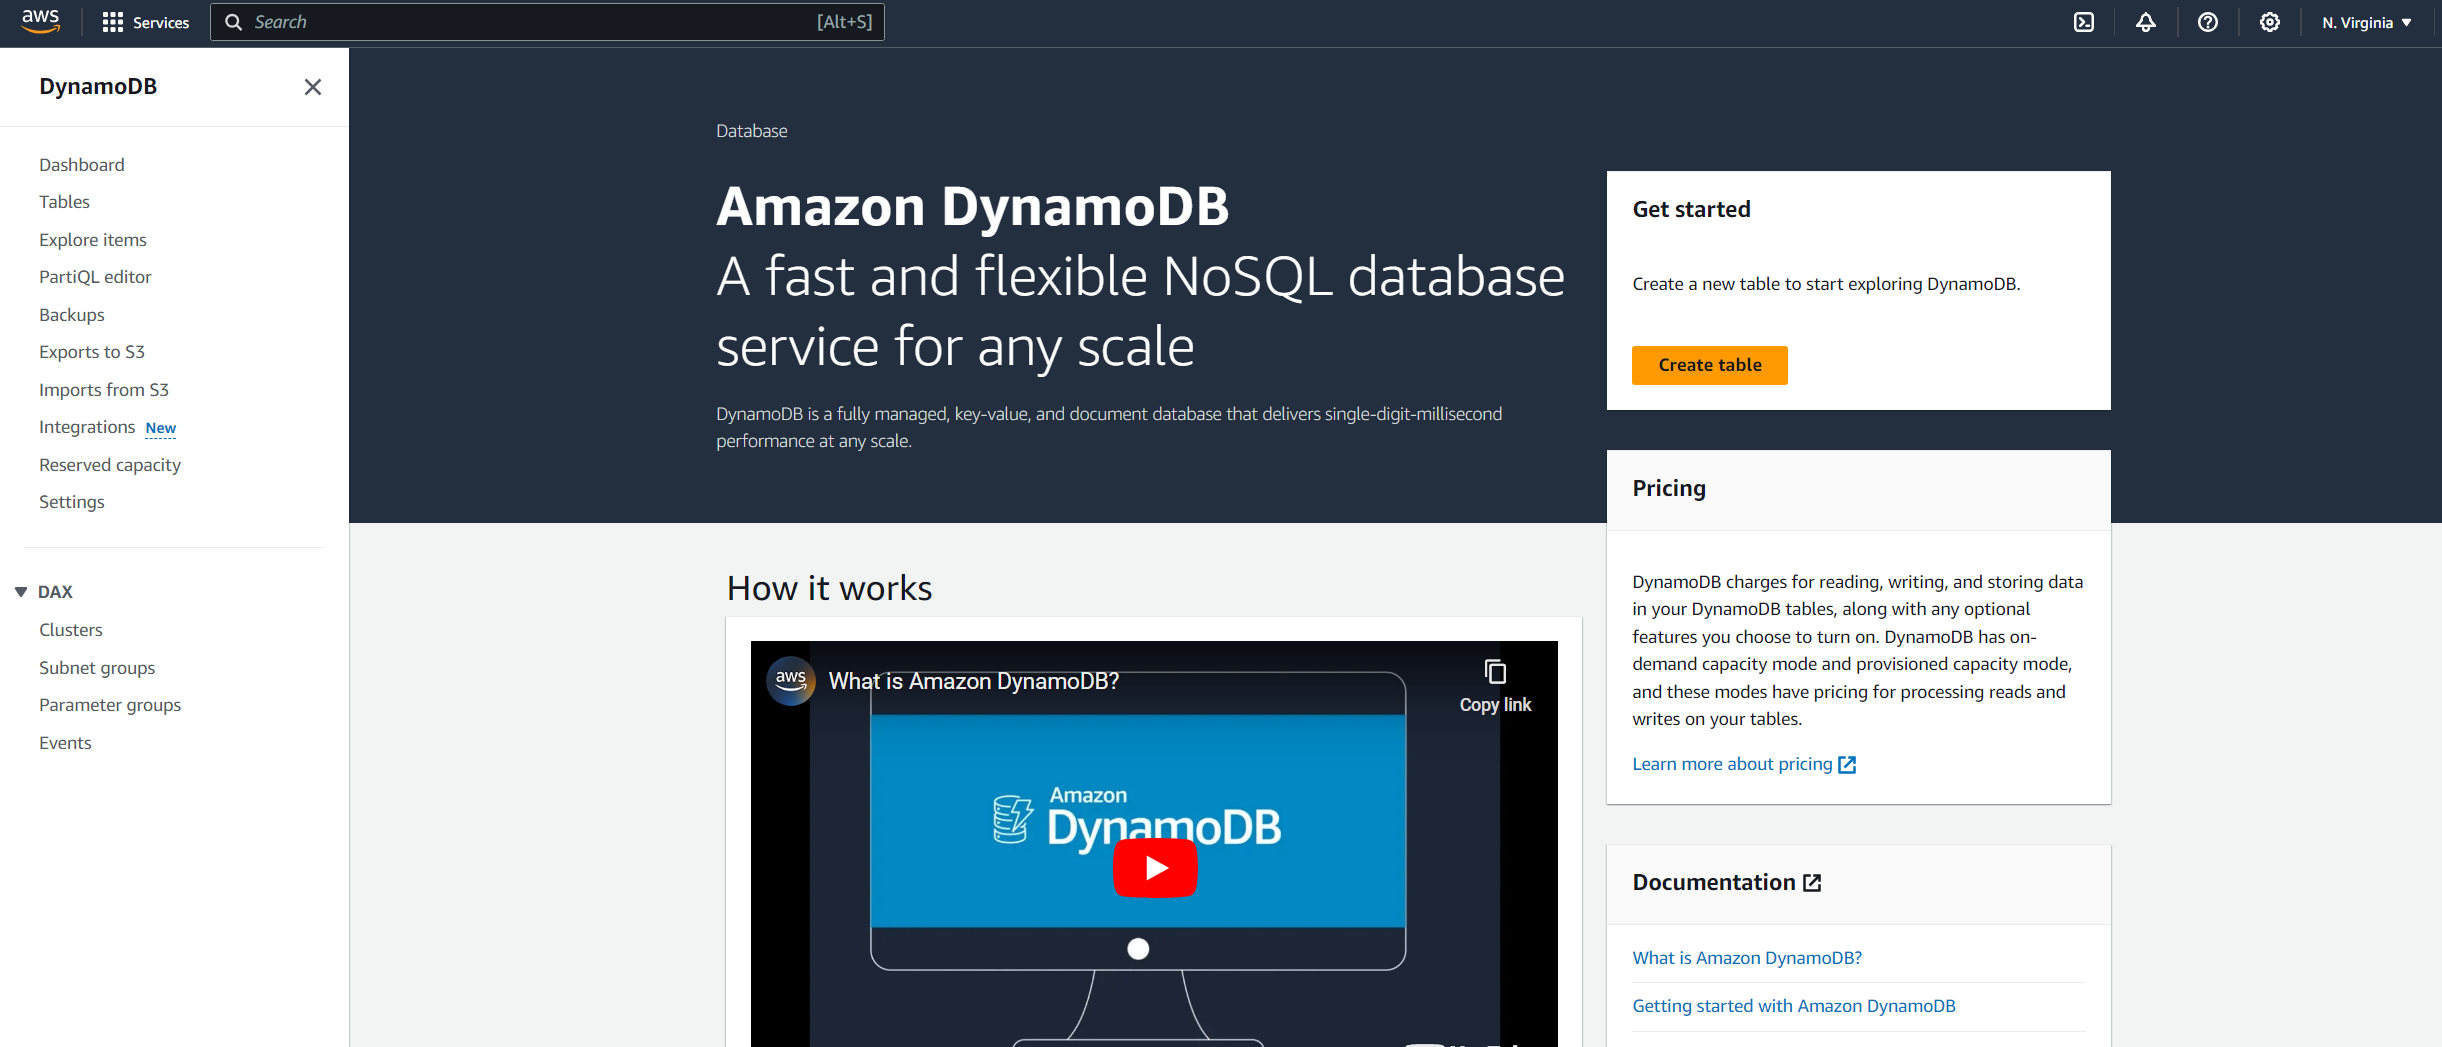
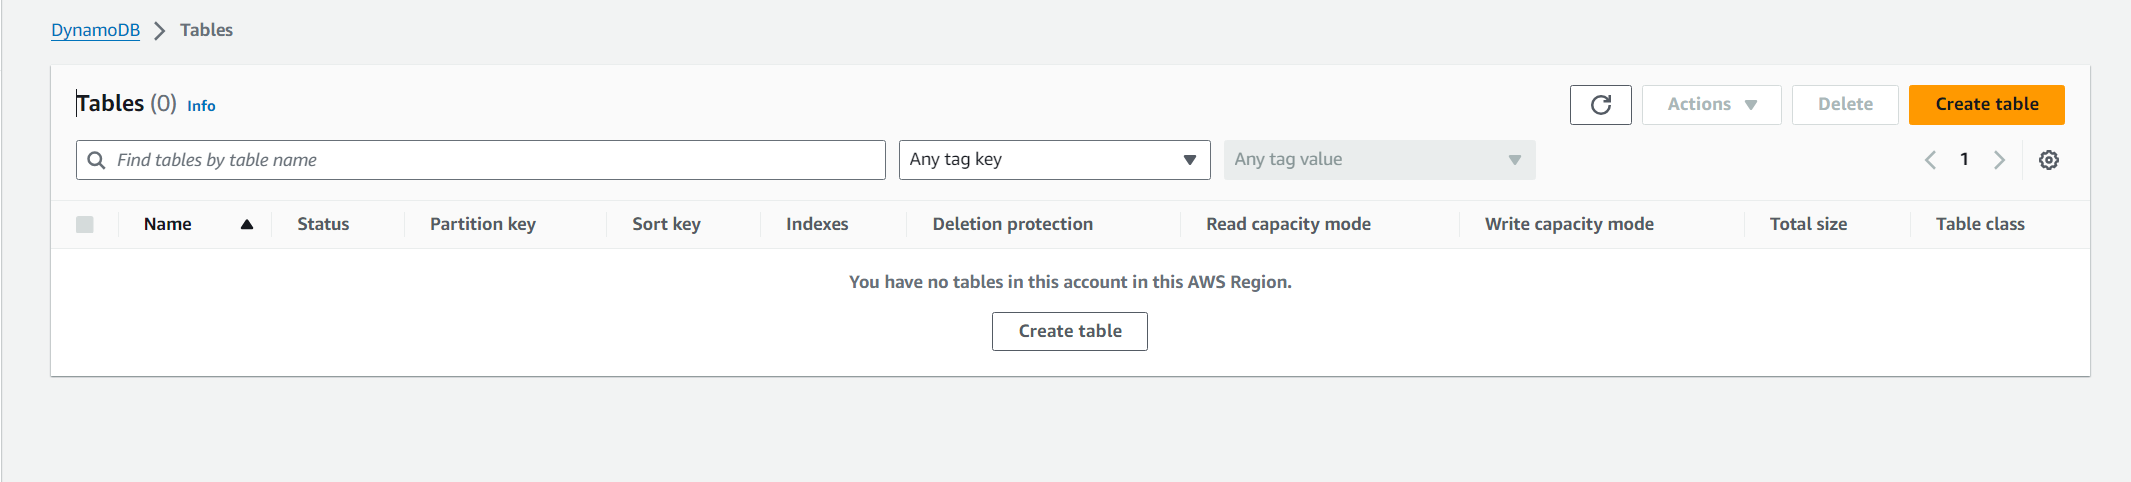
DynamoDB
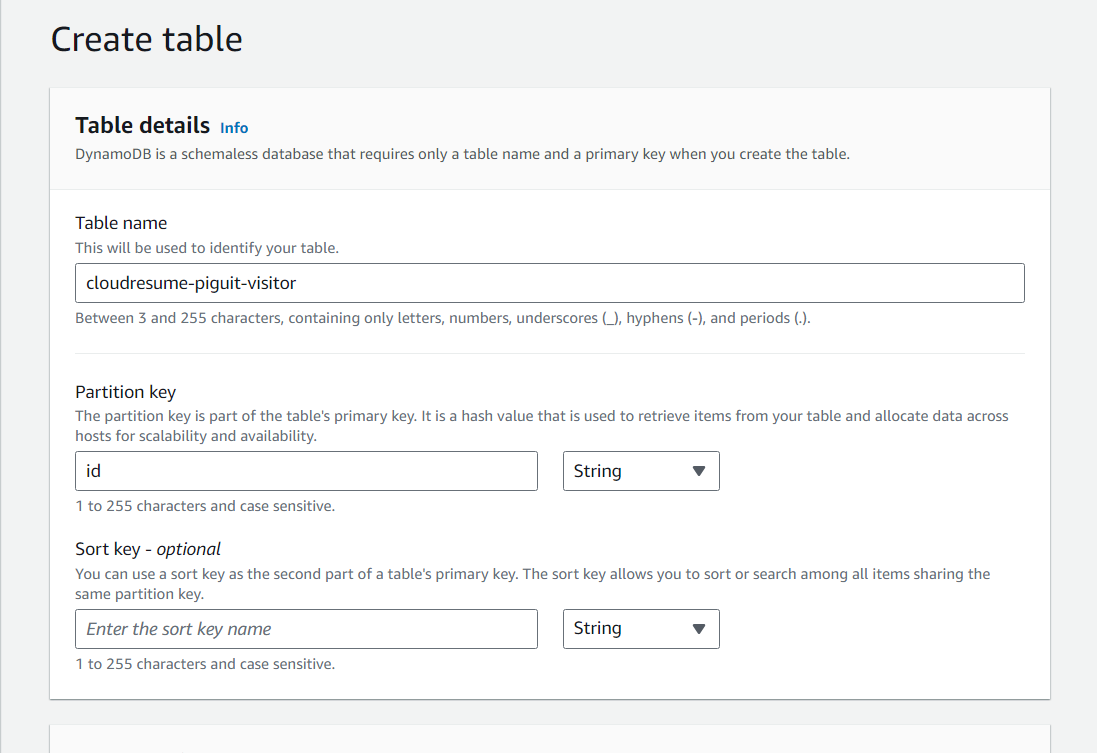
- Navigate to AWS Console and into DynamoDB services, select “Create Table”
- Input a table name, then set the partition key to id. Then create table
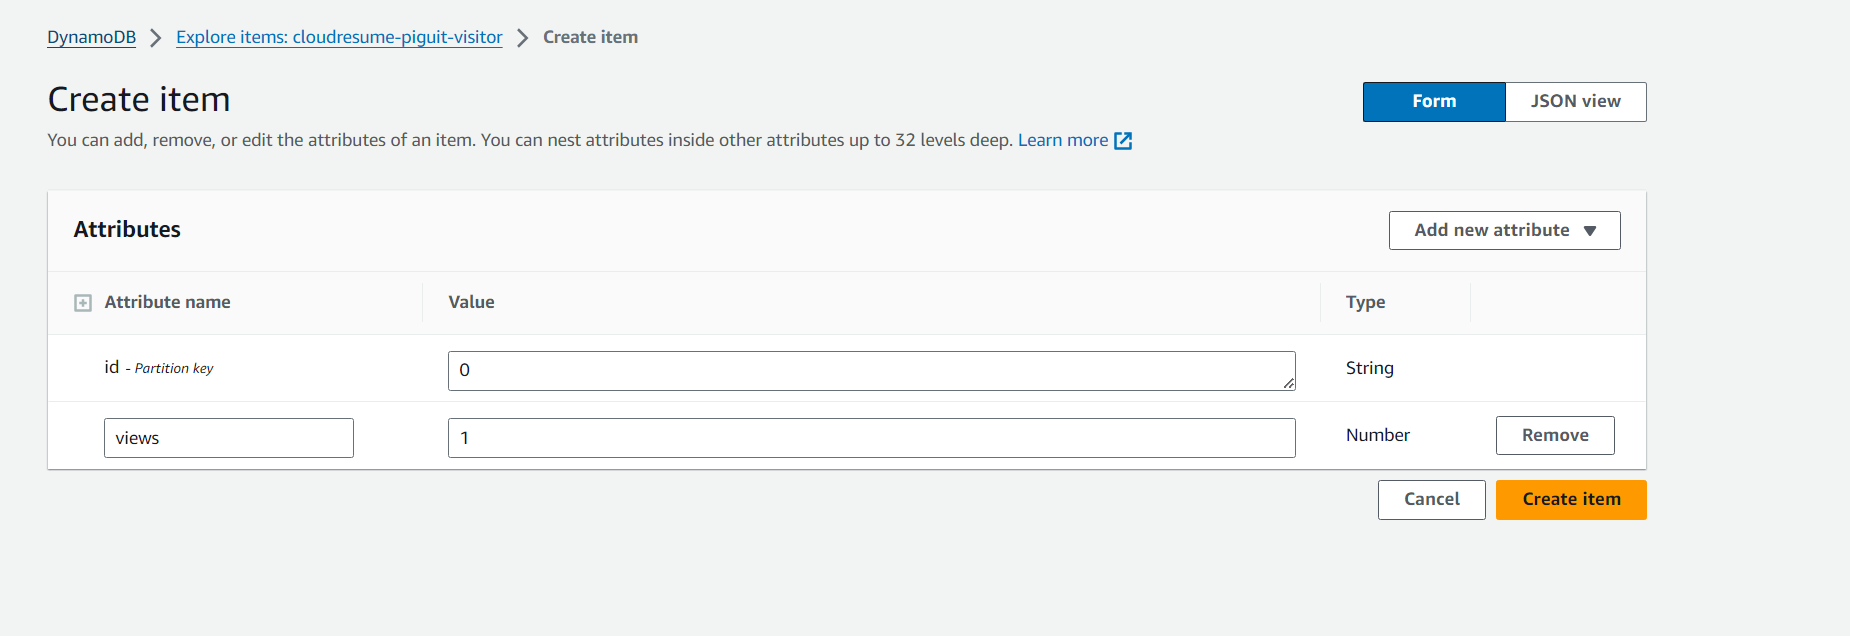
- Once the table is created, navigate to actions and explore items
- Then select create item


- Add a new item with attribute of numbers and name it views, and assign it a value of 1
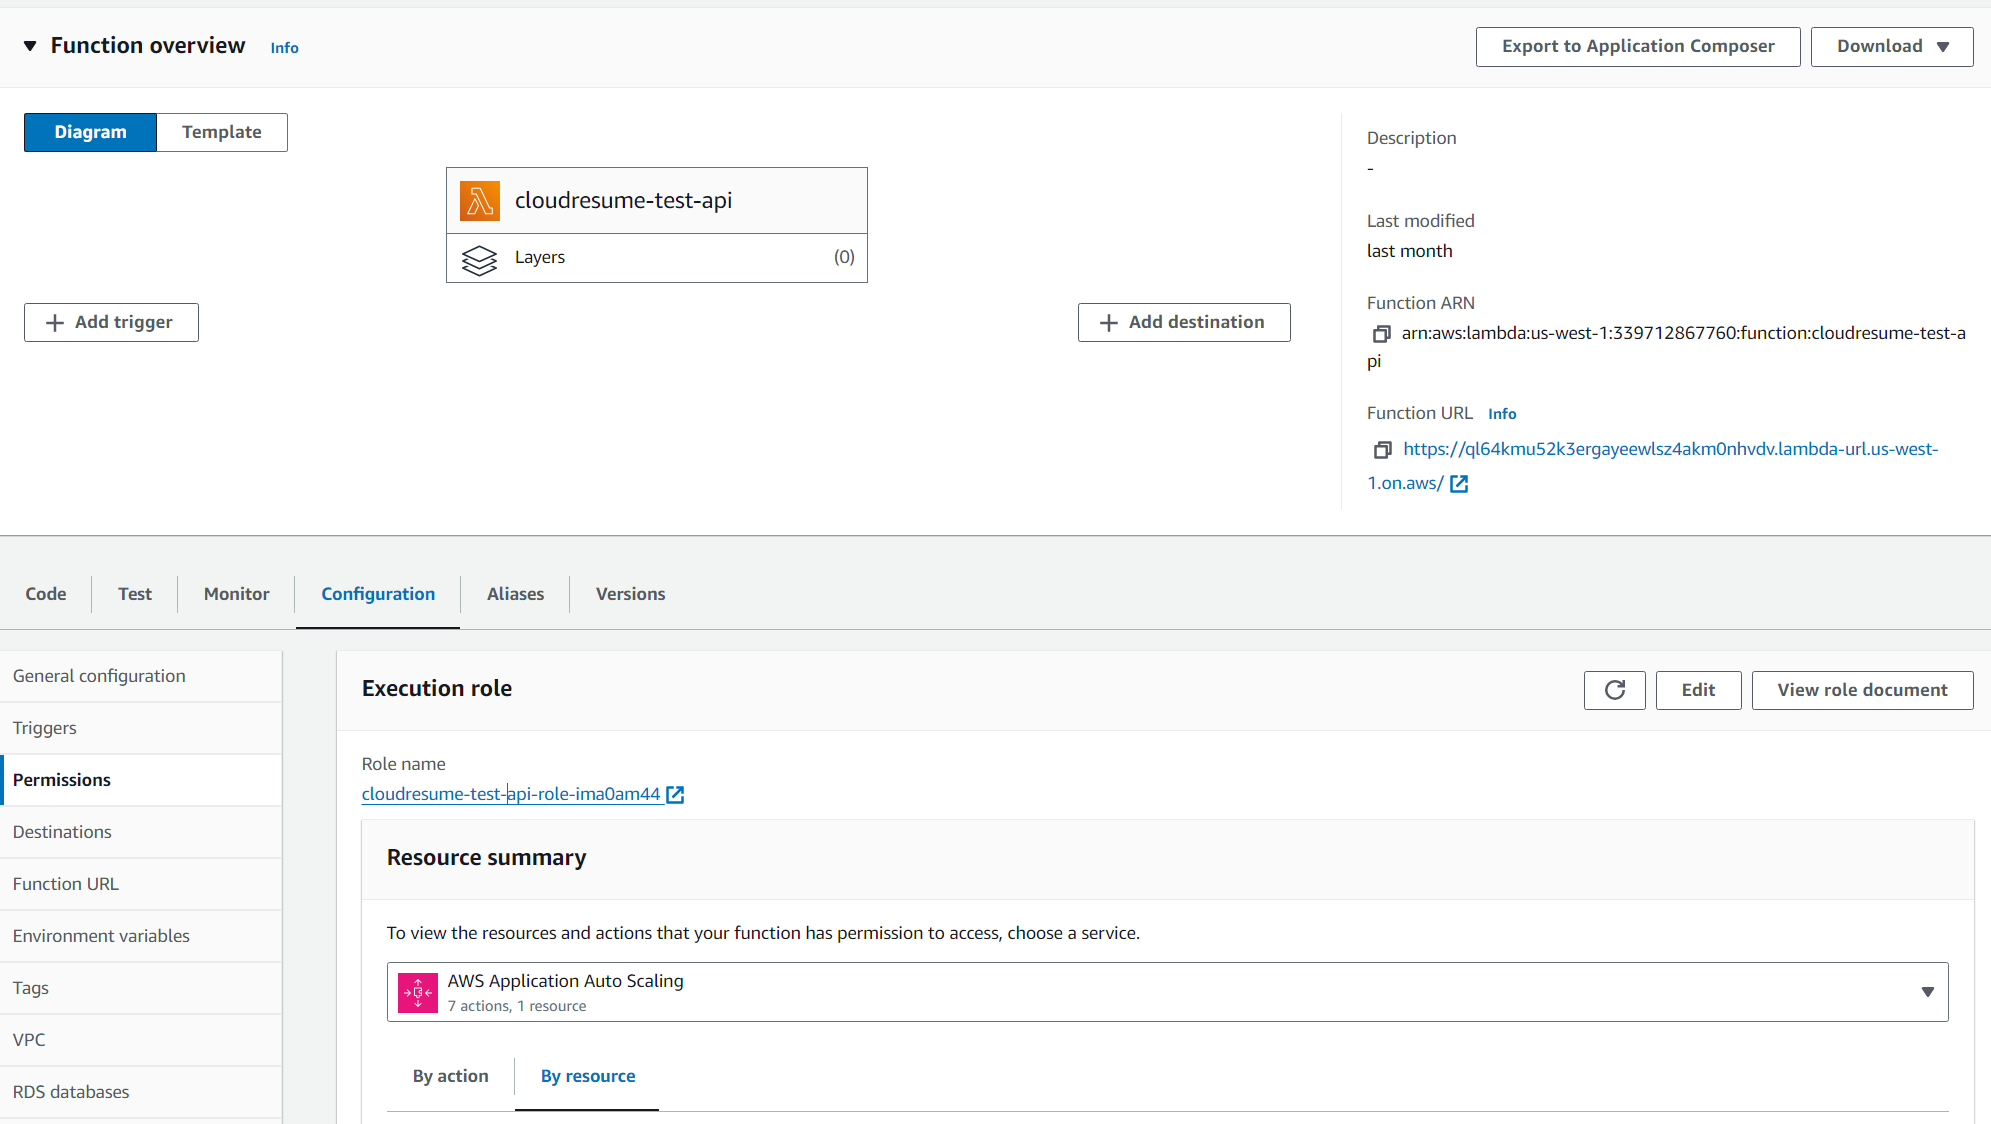
AWS Lambda_Function
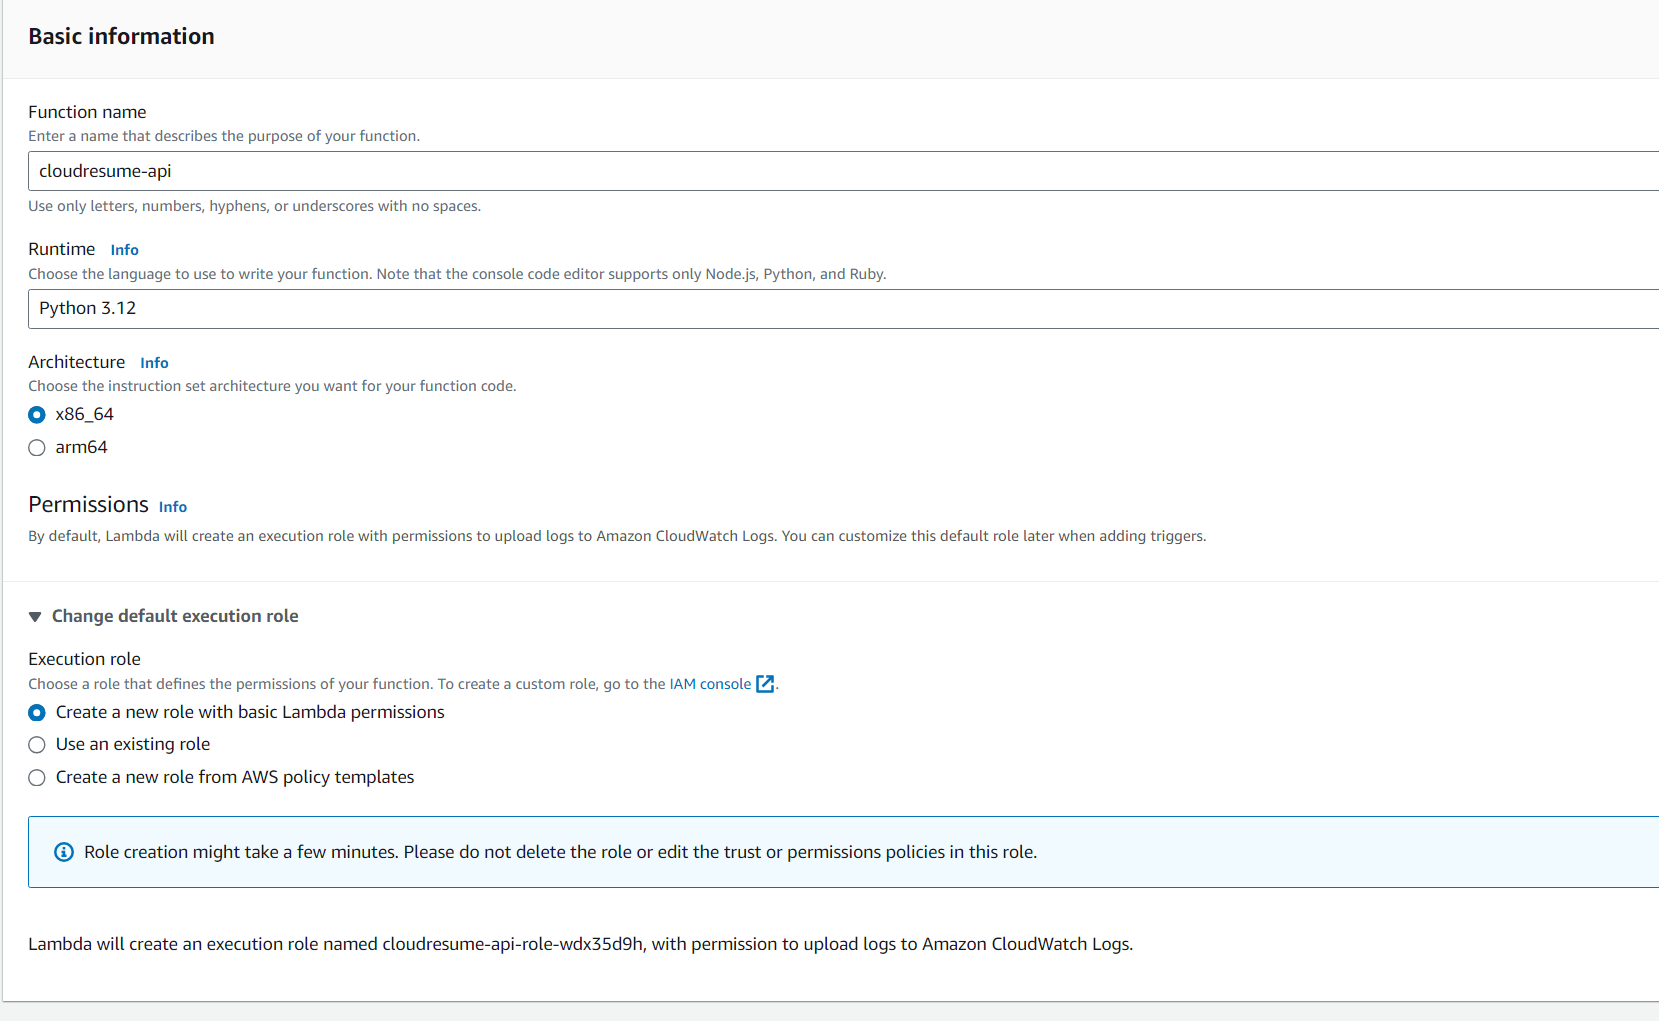
- Navigate to AWS Console and into Lambda Services, then select create a function

-
In the new window, give your lambda function a name, I named mine cloudresume-api
-
Then set the default execution role to “Create a new role”
-
In the advanced settings, Check in Enable function URL so the function can be accessed via a URL and set auth type to NONE allowing everyone access to the function. Then check in Configure cross-origin resource sharing
-
Then select create function
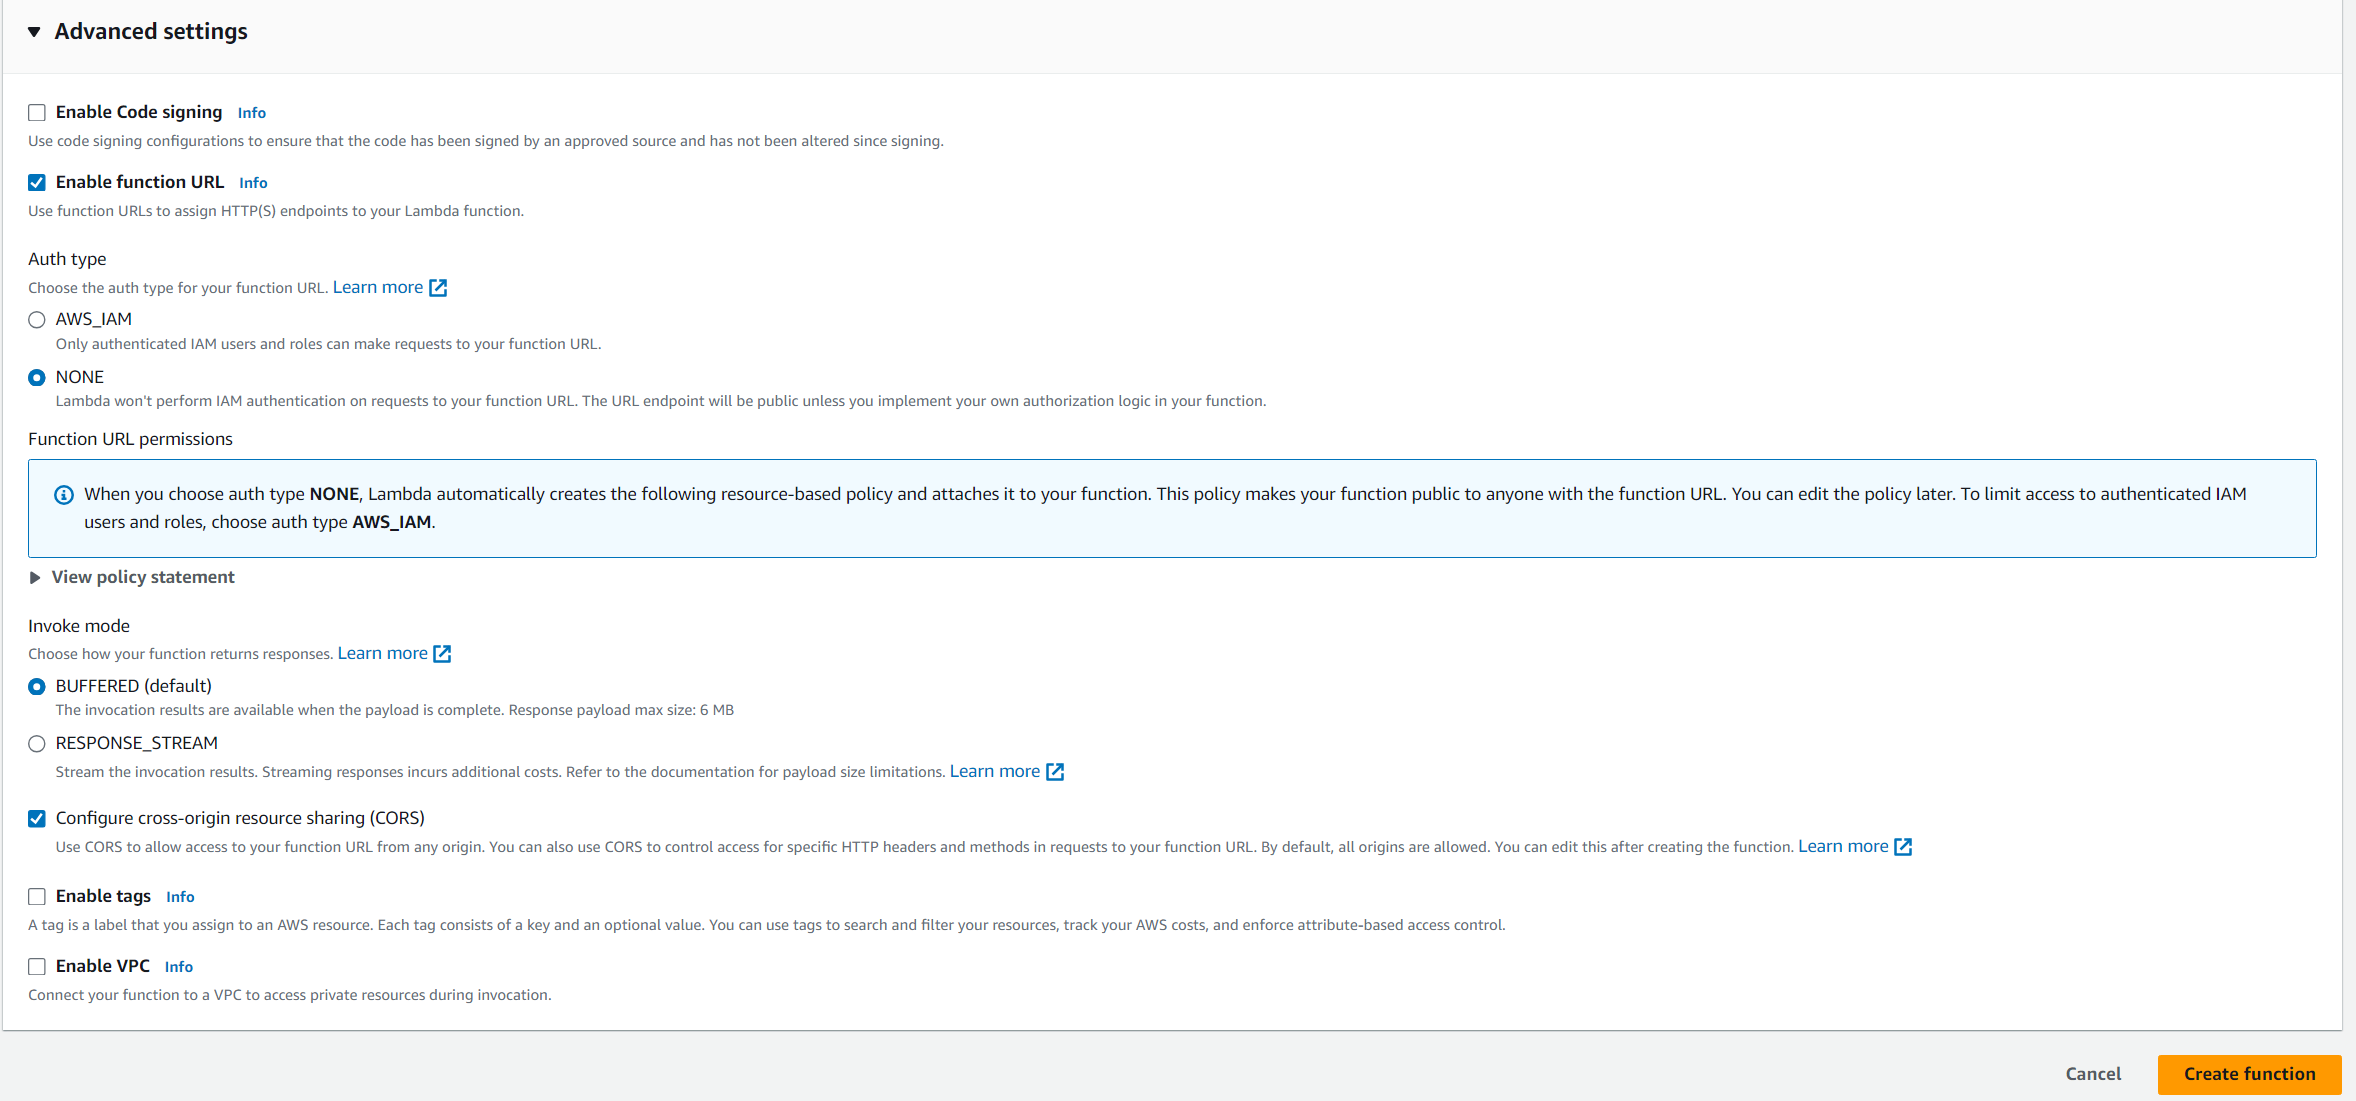
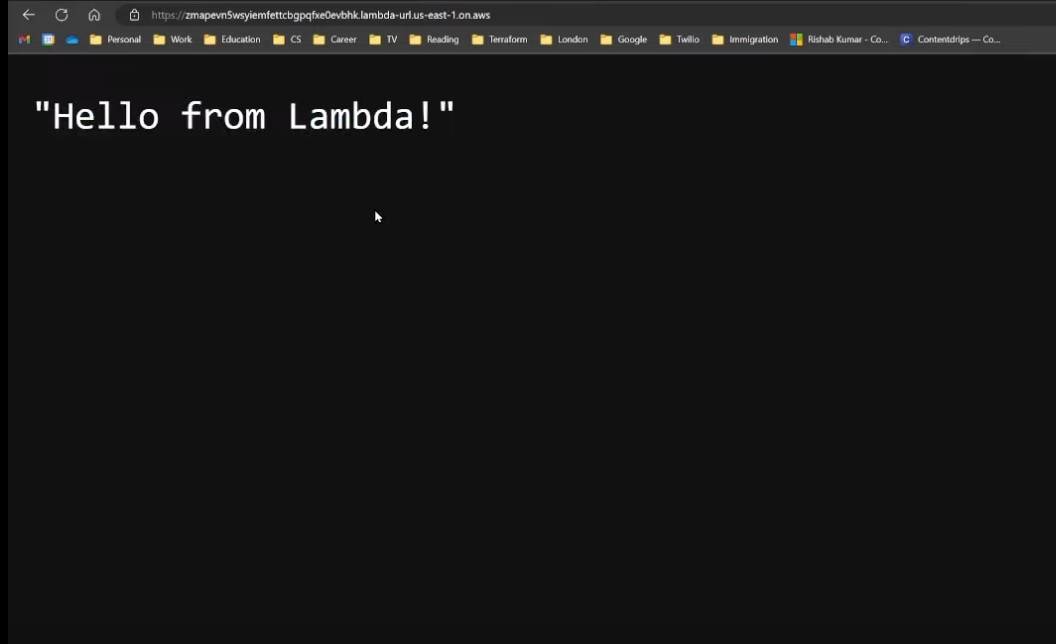
- In the newly created function, you will be able to see a Function URL, which after you navigate to on your browser, you can see Hello from lambda displayed

-
Now we edit the code in the lambda function to display our view count
-
You can copy and paste my code from: https://github.com/kai-ion/aws-cloud-resume/blob/main/Lambda-function/lambda_function.py
-
Remember to set the correct table name and the table item Ids
-
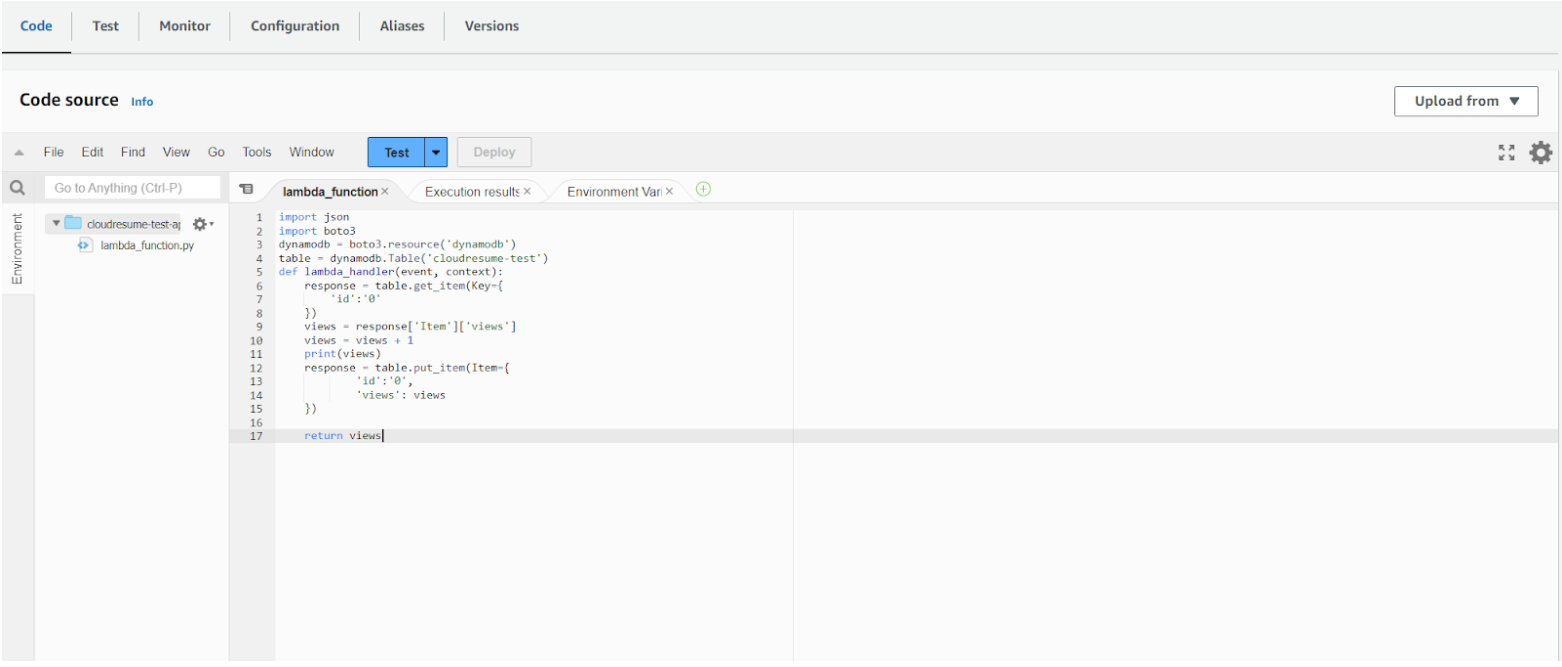
-
Test if there is any bug with ur function and then select Deploy
-
You should be able to view the visitor count in the aforementioned lambda URL
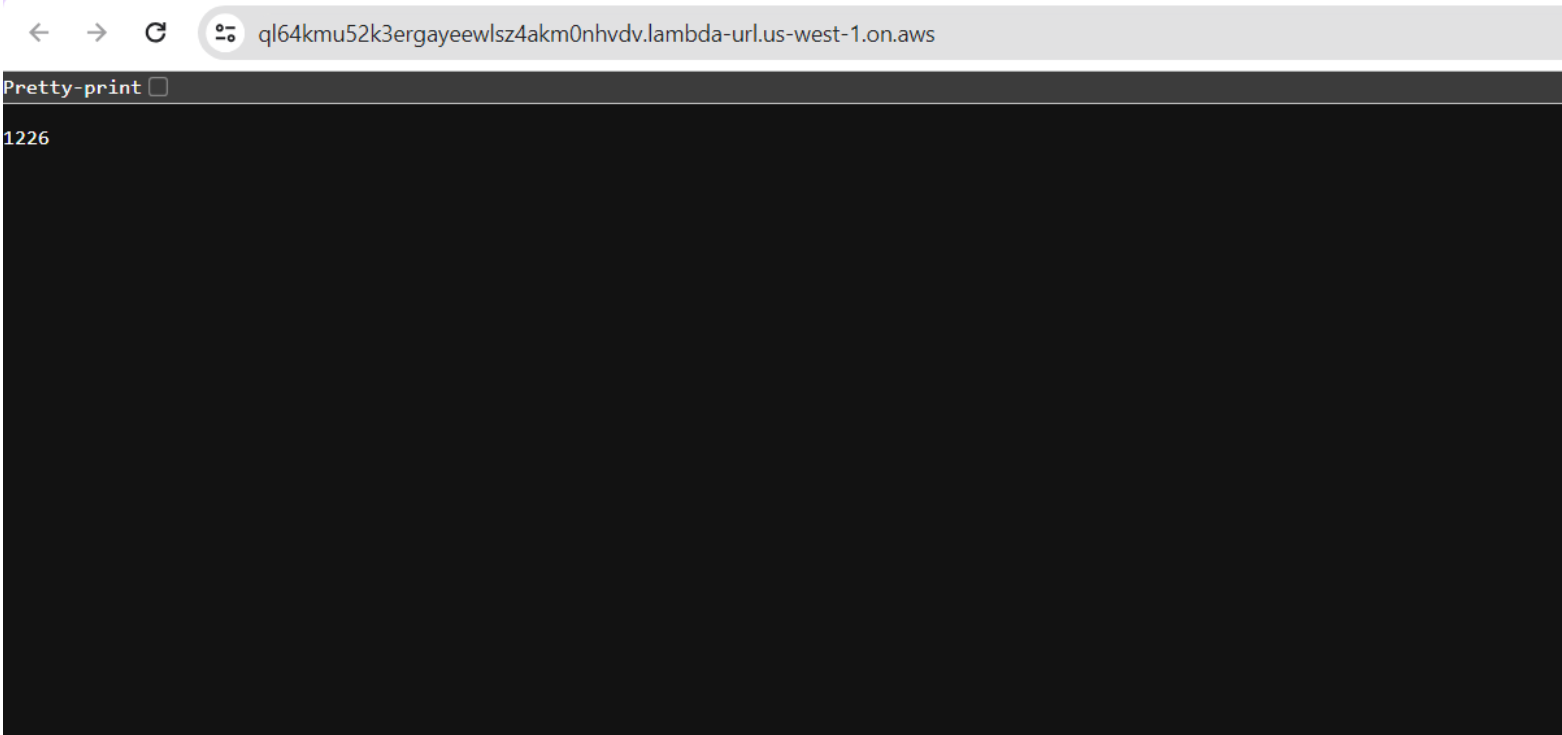
- Now we can add this function url to our JS code in the previous step

AWS Lambda_function connection
- Setup lambda function to get the records from dynamoDB, go to the function and navigate to the configuration tab and then the permission tab
- Click on the role under Role name to open an IAM window, then click add permissions under permissions tab, and select attach policy
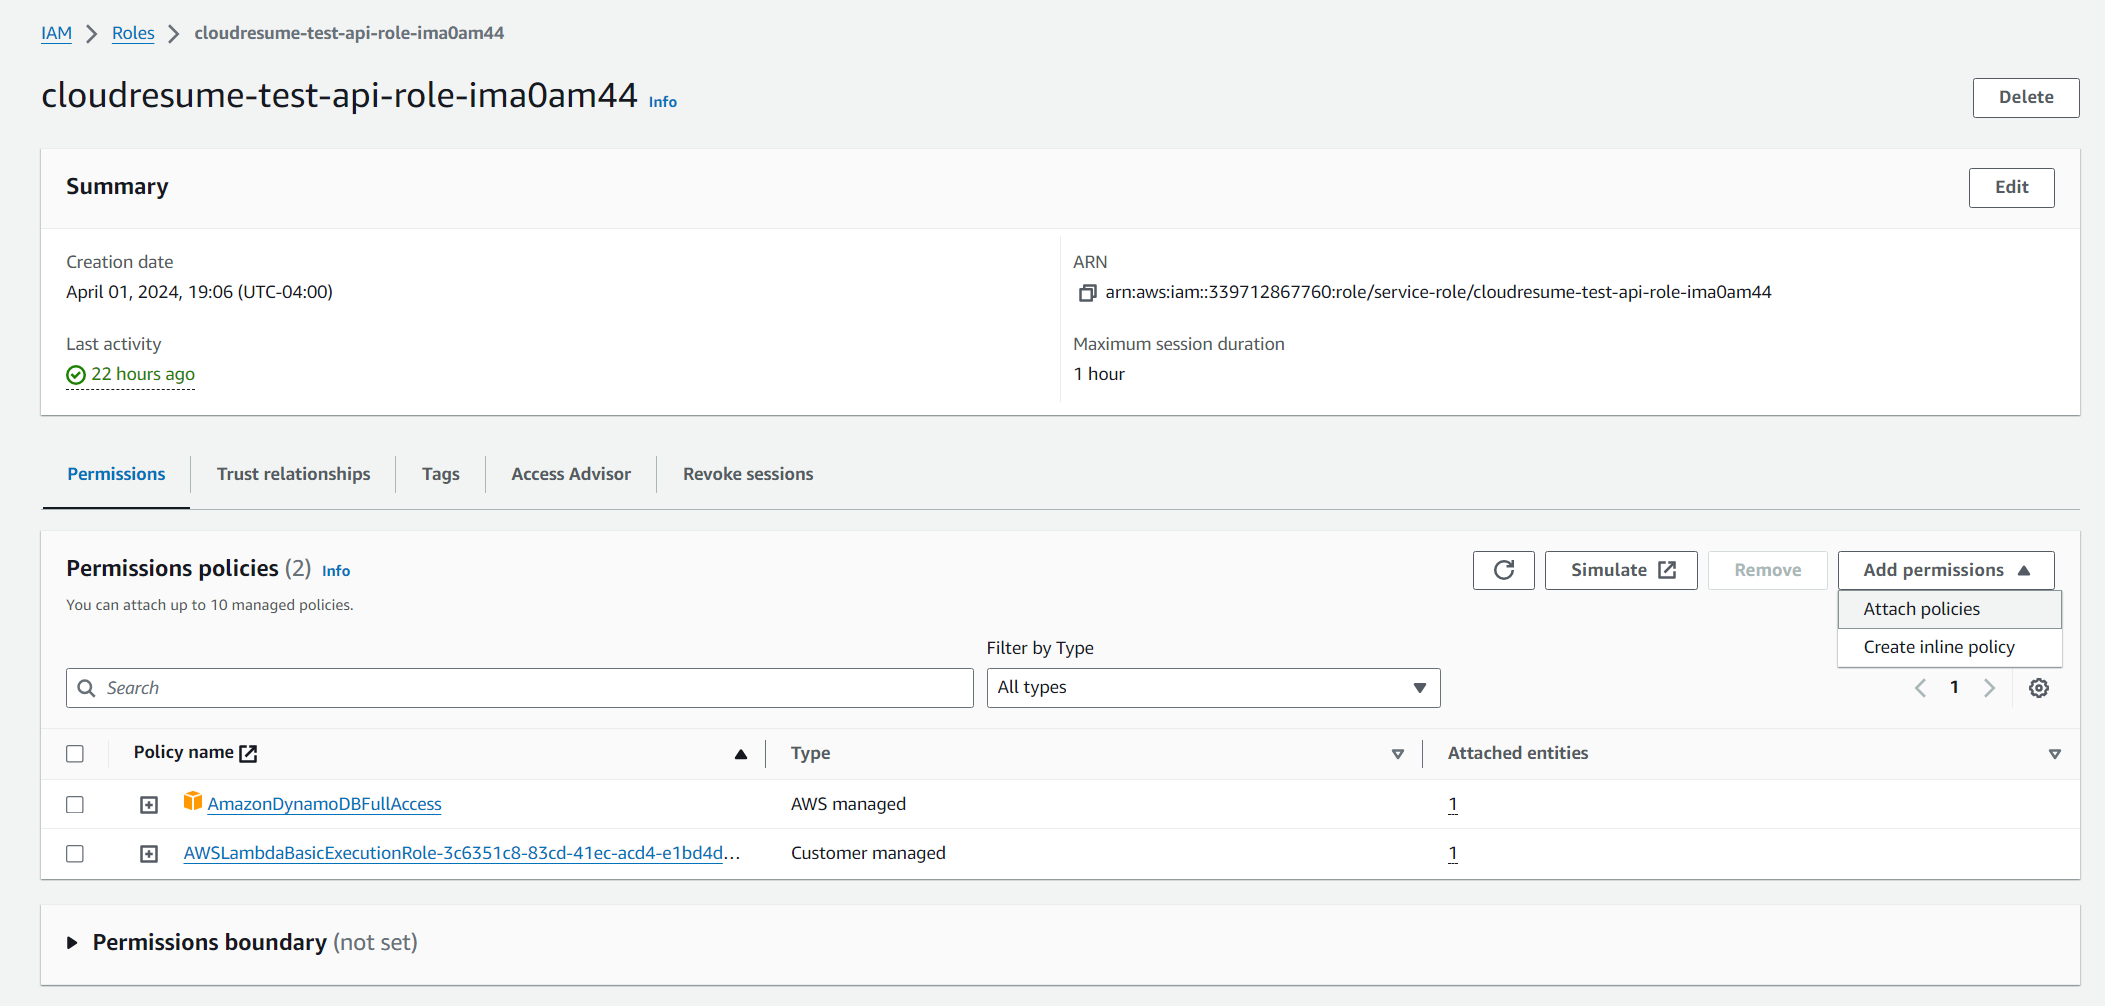
- In the search bar, look up dynamoDB, then add the policy needed. In my case I added full access permission

Git and CI/CD
-
Create a github repo and upload all the website files to the repo
-
Now we have to setup github actions by creating a directory called .github/workflows
- Inside of it, we will create a file called front-end-cicd.yml
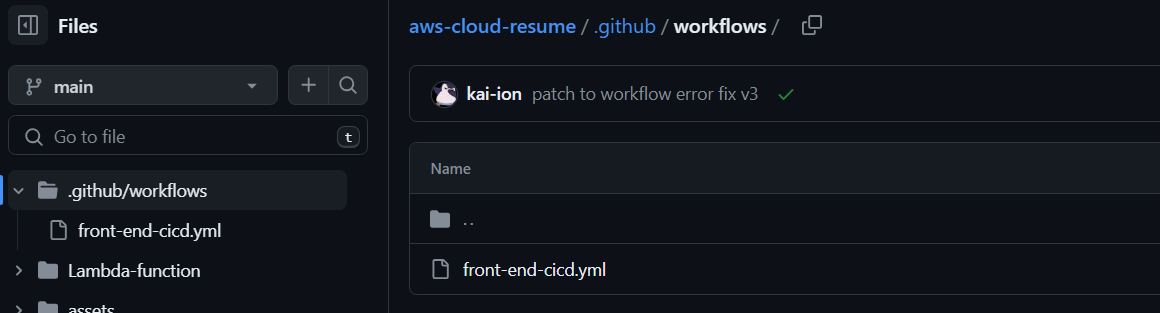
-
You can paste my code: link
- In the code, we use the steps checkout and sync from github actions and jakejarvis to checkout from github and sync it to our aws s3 bucket
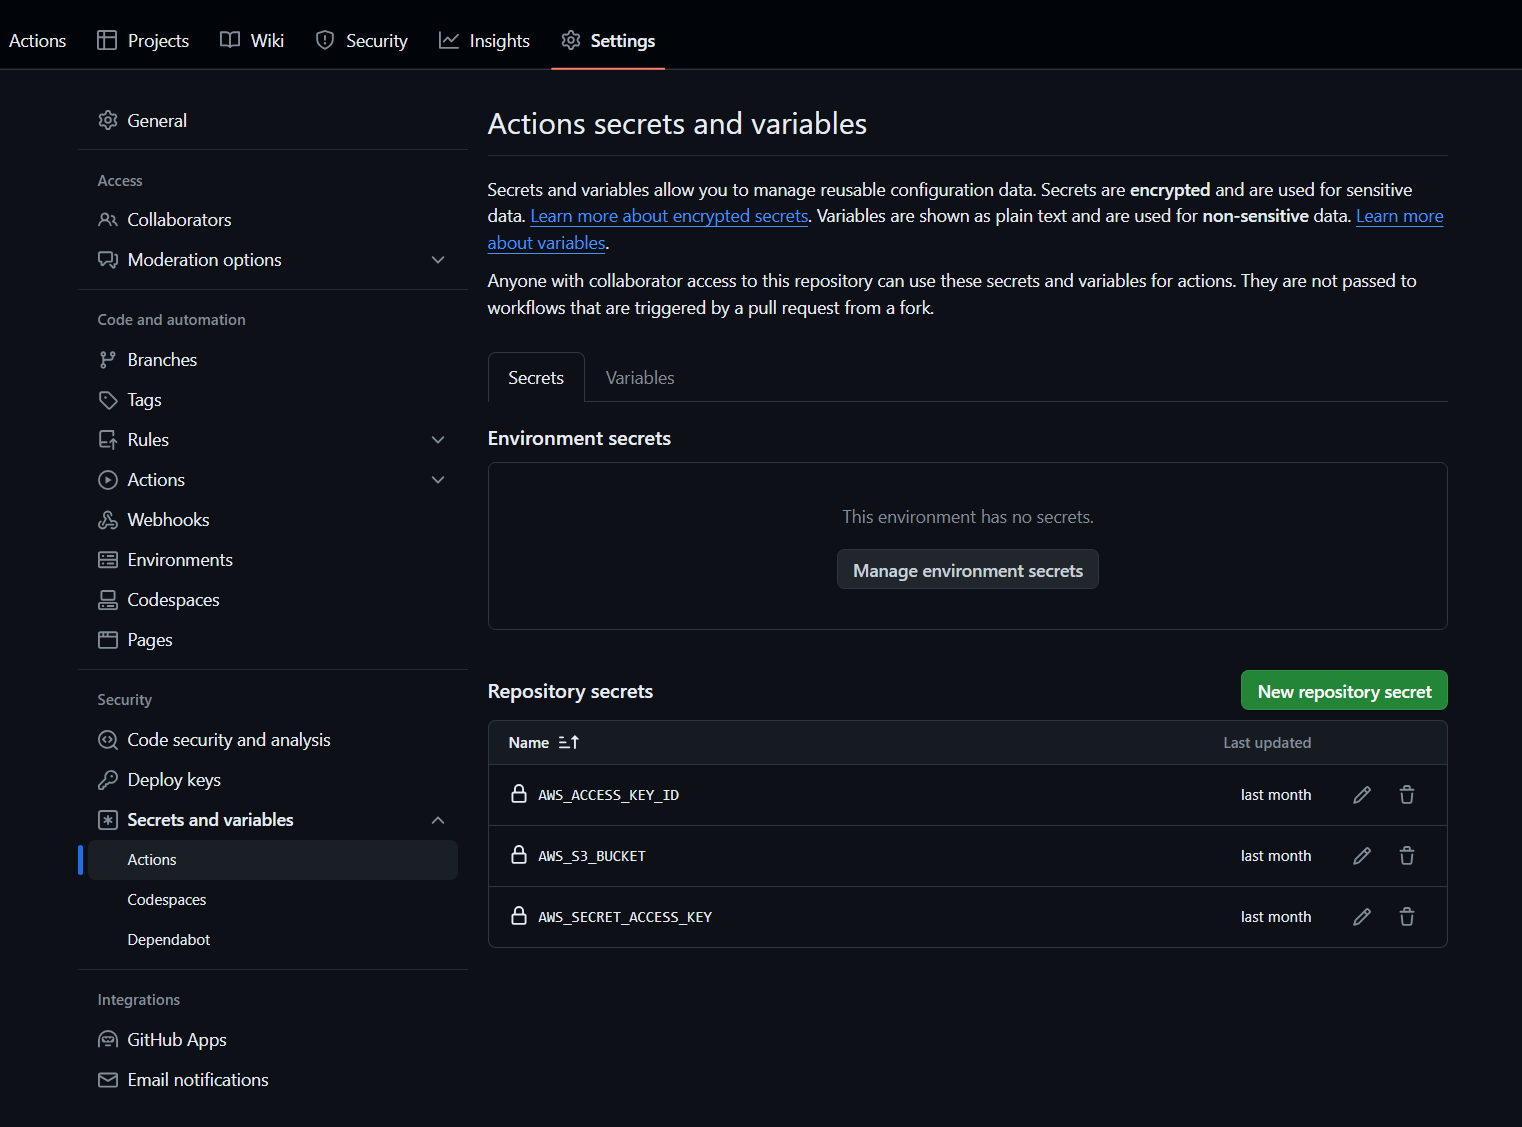
- After you push the new codes onto github, you have to setup your secrets or access keys to your aws profile
- Log onto aws and set up a new user and give it the access type you want
- Keep note of the keys
- Next we go back to github and add the keys in secrets and variables in settings
- Now the build should be successful and your repo and s3 bucket should be sync up